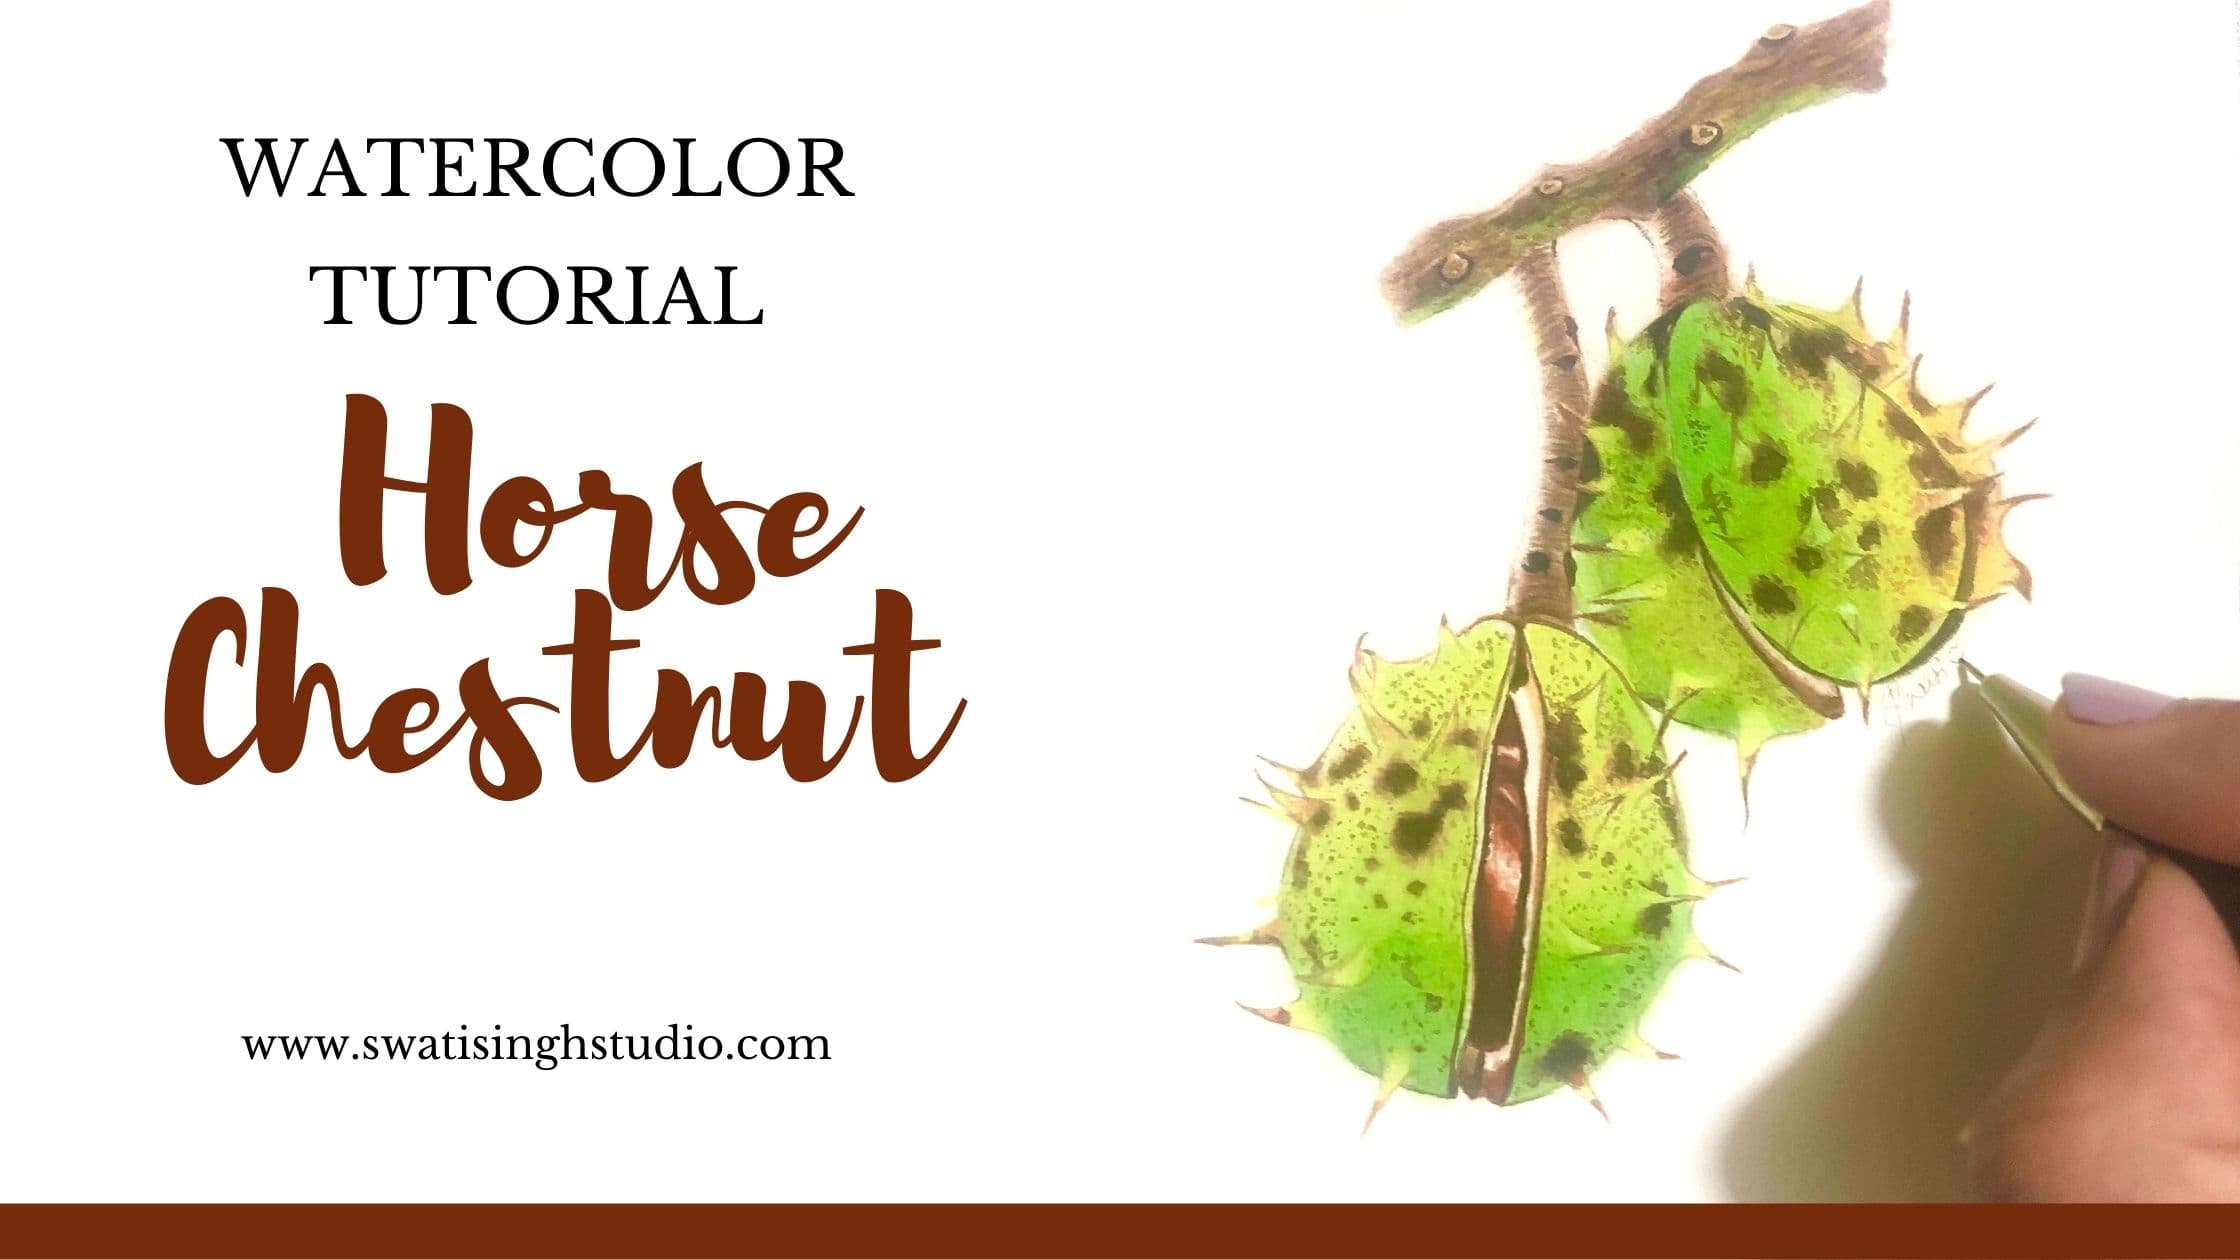
Hello, my lovely artists! Hope you all are doing great. It’s time to add in another study to our autumn page. The subject for today is none other than the horse chestnut fruit. In the last tutorial we tackled a beautiful chestnut leaf and taking it further today we will explore this beautiful fruit. Horse chestnut is also called as a Conker tree.
Did you know?
Conkers is a traditional children’s game in Britain and Ireland. The players use the seeds of the fruit to strike each other’s conker until one break! In fact, there is a World Conker Championships held in Britain every year during the month of October.
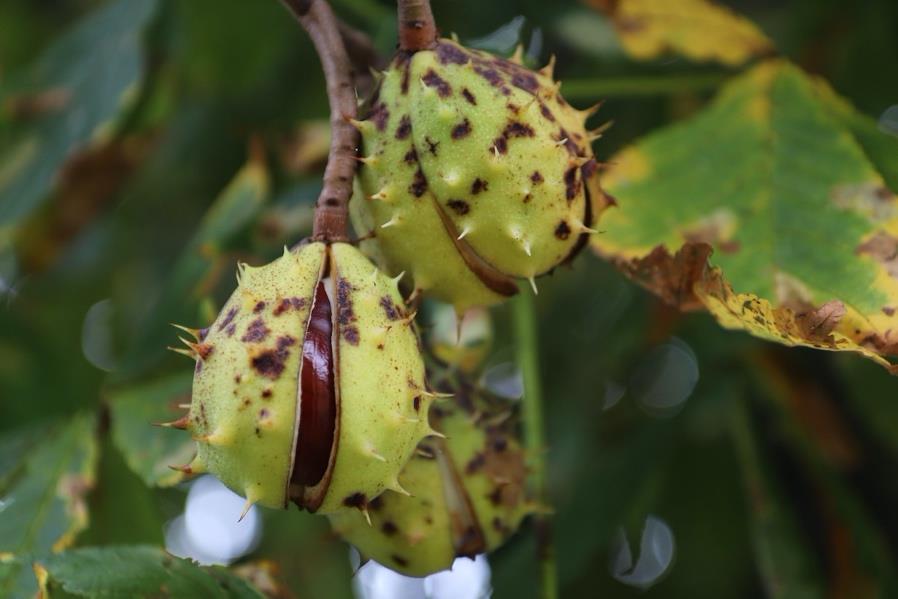
REFERENCE IMAGE
If you look carefully, what makes this fruit a beautiful subject is not only the shiny brown seed but also the prickly exterior. This fruit starts ripening in the months of September and October and we see a beautiful pattern of brown on the skin.
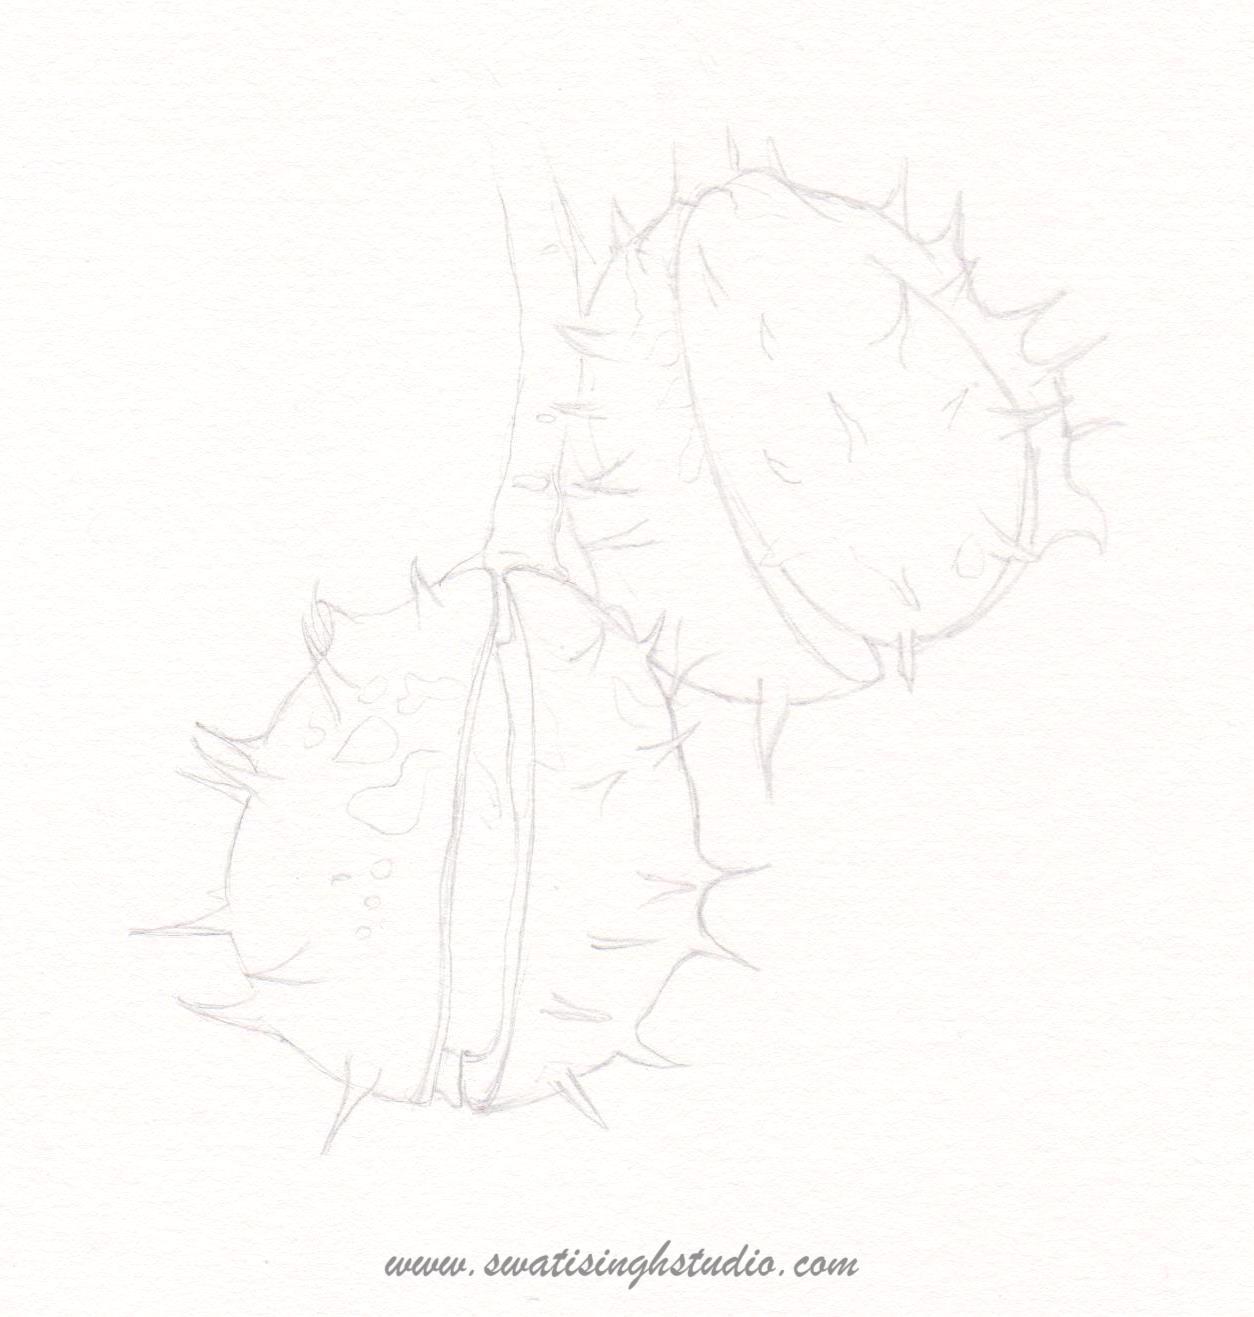
THE DRAWING
WATERCOLORS REQUIRED
1. Lemon yellow
2. Sap green
3. Viridian green
4. Burnt Sienna
5. Ultramarine blue
6. Burnt umber
7. Scarlet Red
BRUSHES REQUIRED: #0, #2
THE METHOD
The tutorial has been divided into 2 parts. In part 1 we will tackle the shell. In the second part, we will take care of the seed inside and the stems.
PART1- The shell
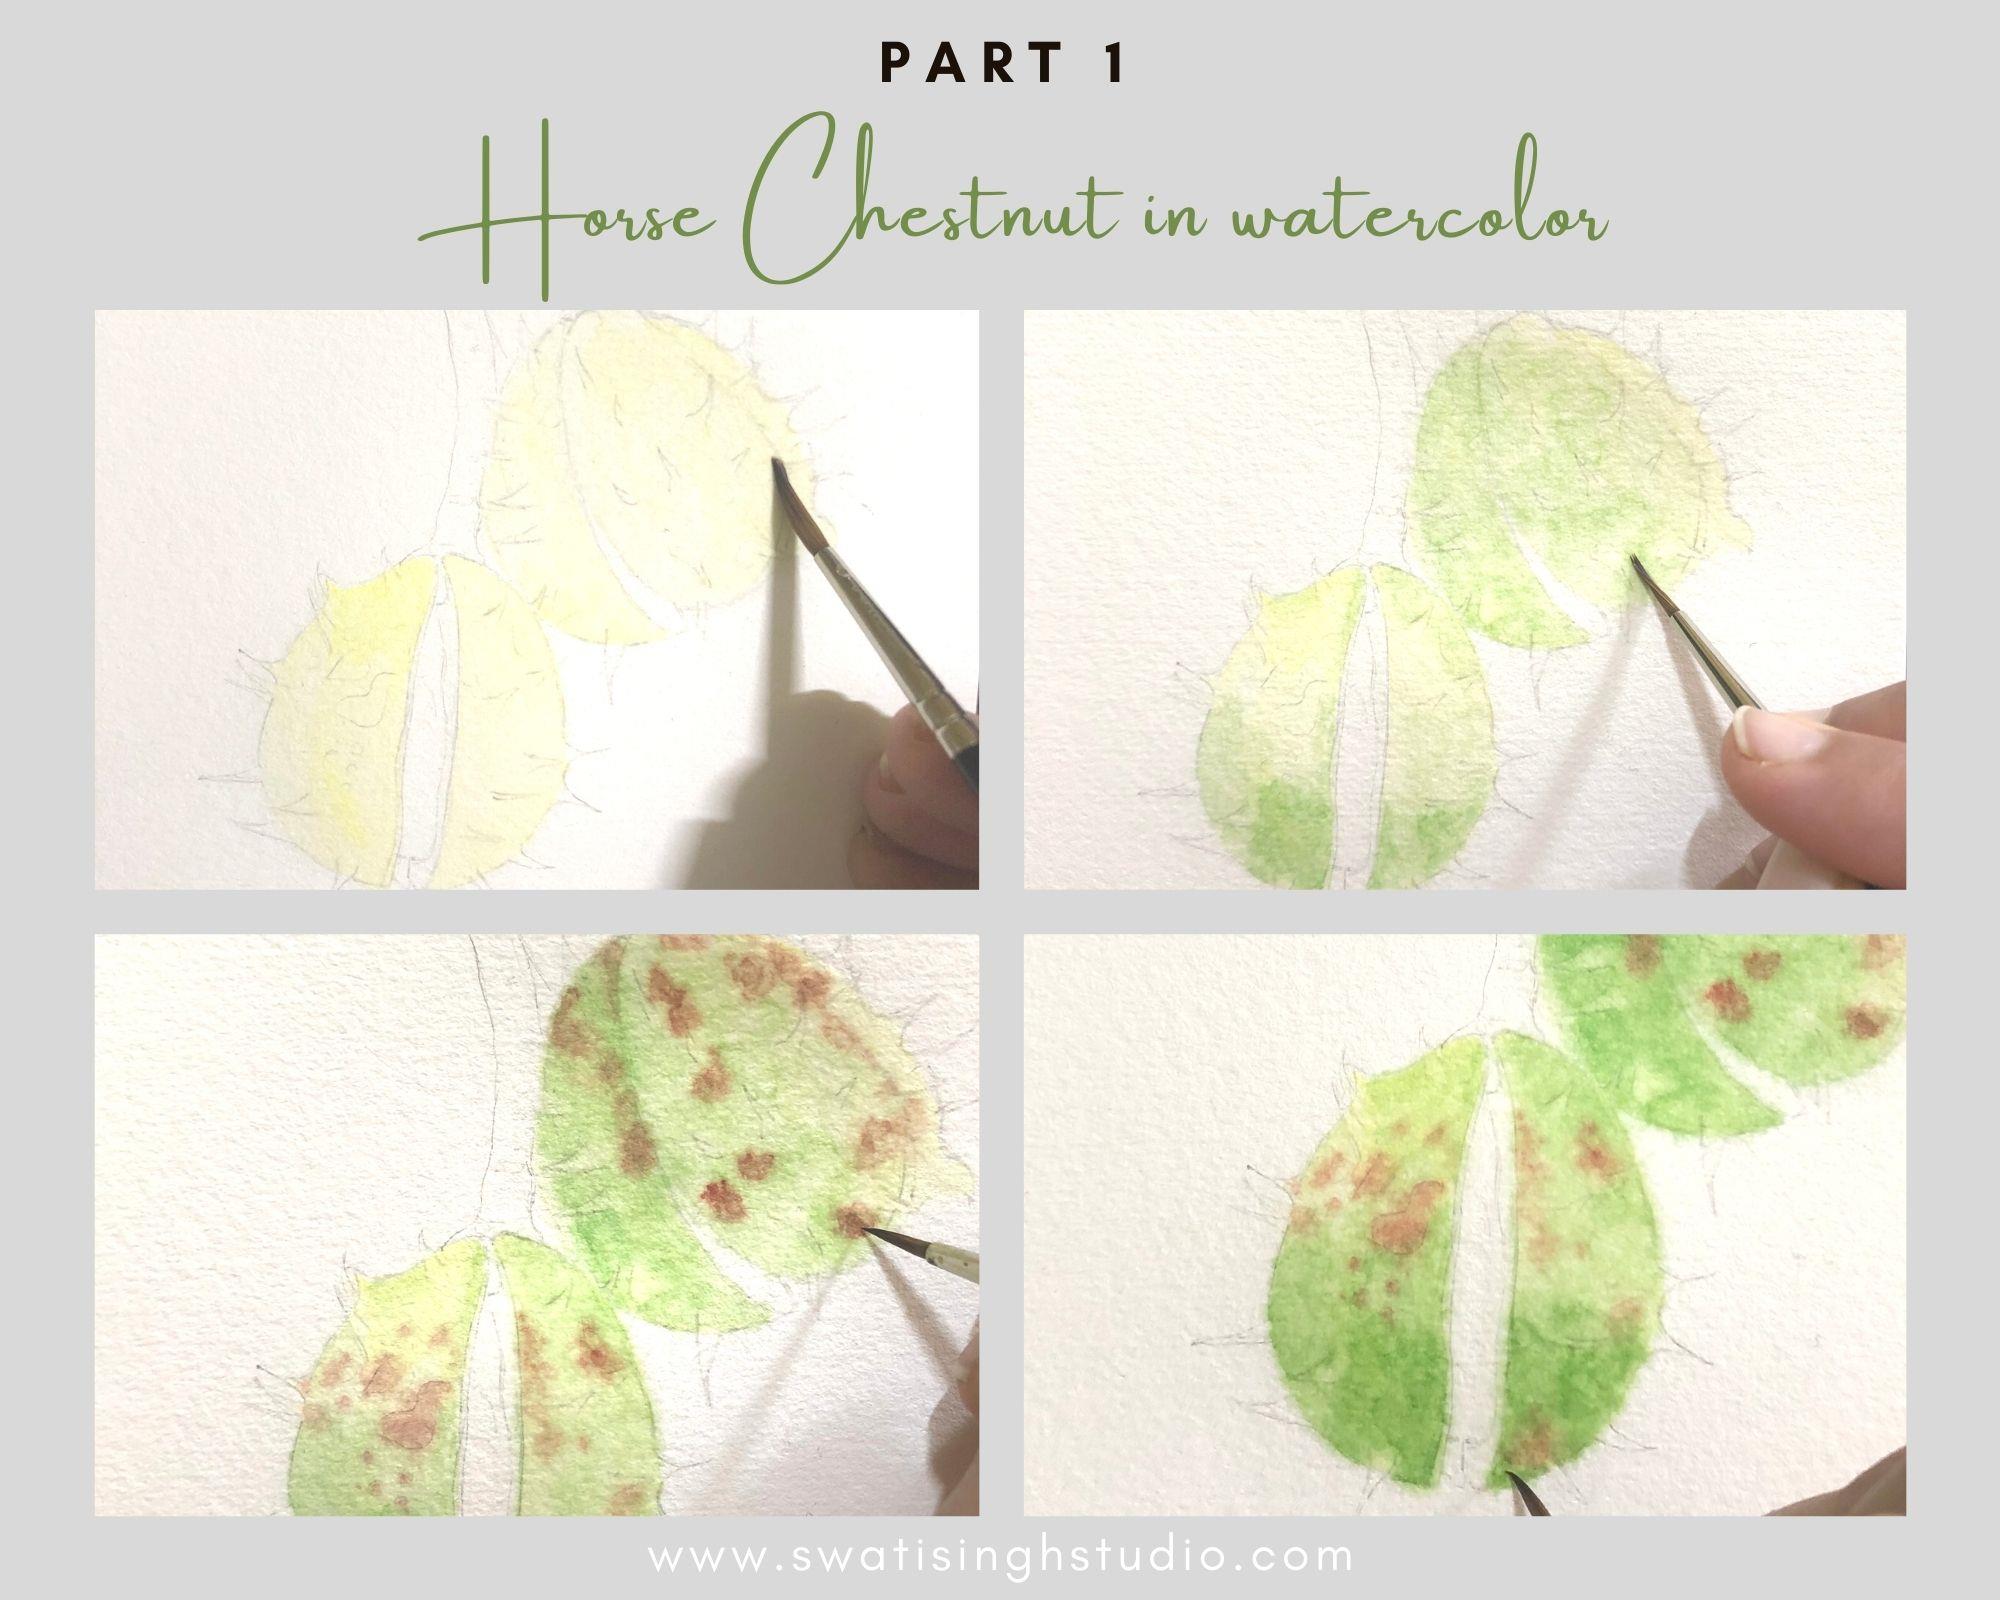
Step 1- Glaze the area with clear water before adding in any color. This prepares the sheet for accepting color. Follow by adding a pale wash of lemon yellow using a # 2 brush.
Important: You do not need to keep it too watery since the sheet is already wet. If you feel you have picked a lot of color, simply dab it on a tissue paper before proceeding.
Let the layer dry completely.
Step 2- If we observe the green color of these chestnut shells, we find that they are quite yellowish and almost look neon in some areas.
Keeping this in mind we need to make slight changes in the sap green. By adding a small amount of Viridian green to sap green will help the color pop.
We need to work wet in wet. Hence, glaze the sheet with clear water again. And start dropping in the green color with a #0 brush. Let the water do its job of spreading the color around. Simple touch the tip of the brush and drop color in green areas.
Tip: Start by adding the color in the darkest areas first and move onto the light areas with the same brush without picking up any more color. This will help in getting a natural gradation .
Let it dry completely.
Step 3- Now glaze the layer with clear water and start dropping in burnt sienna with a #0 brush where you see the brown marks. Dropping in color wet in wet helps us achieve a natural look.
Important: Be careful to not overdo it or else you might risk losing onto the green areas.
Tip: Observe the first drop of color closely and see if it is spreading a lot. If that is the case chances are you have taken a lot of water. Hence, dab your brush on a tissue and proceed with other marks.
Let the layer dry completely.
Step 4- We need to strengthen the green color next. Hence add a glaze of clear water all over the fruit. Proceed by adding another layer of green mixed in step 2 by simply dropping it in the shadow areas with a #0 brush. This will help in giving roundness to our subject.
Important: Make sure to leave out the spikes on the surface. Go around them with your brush.
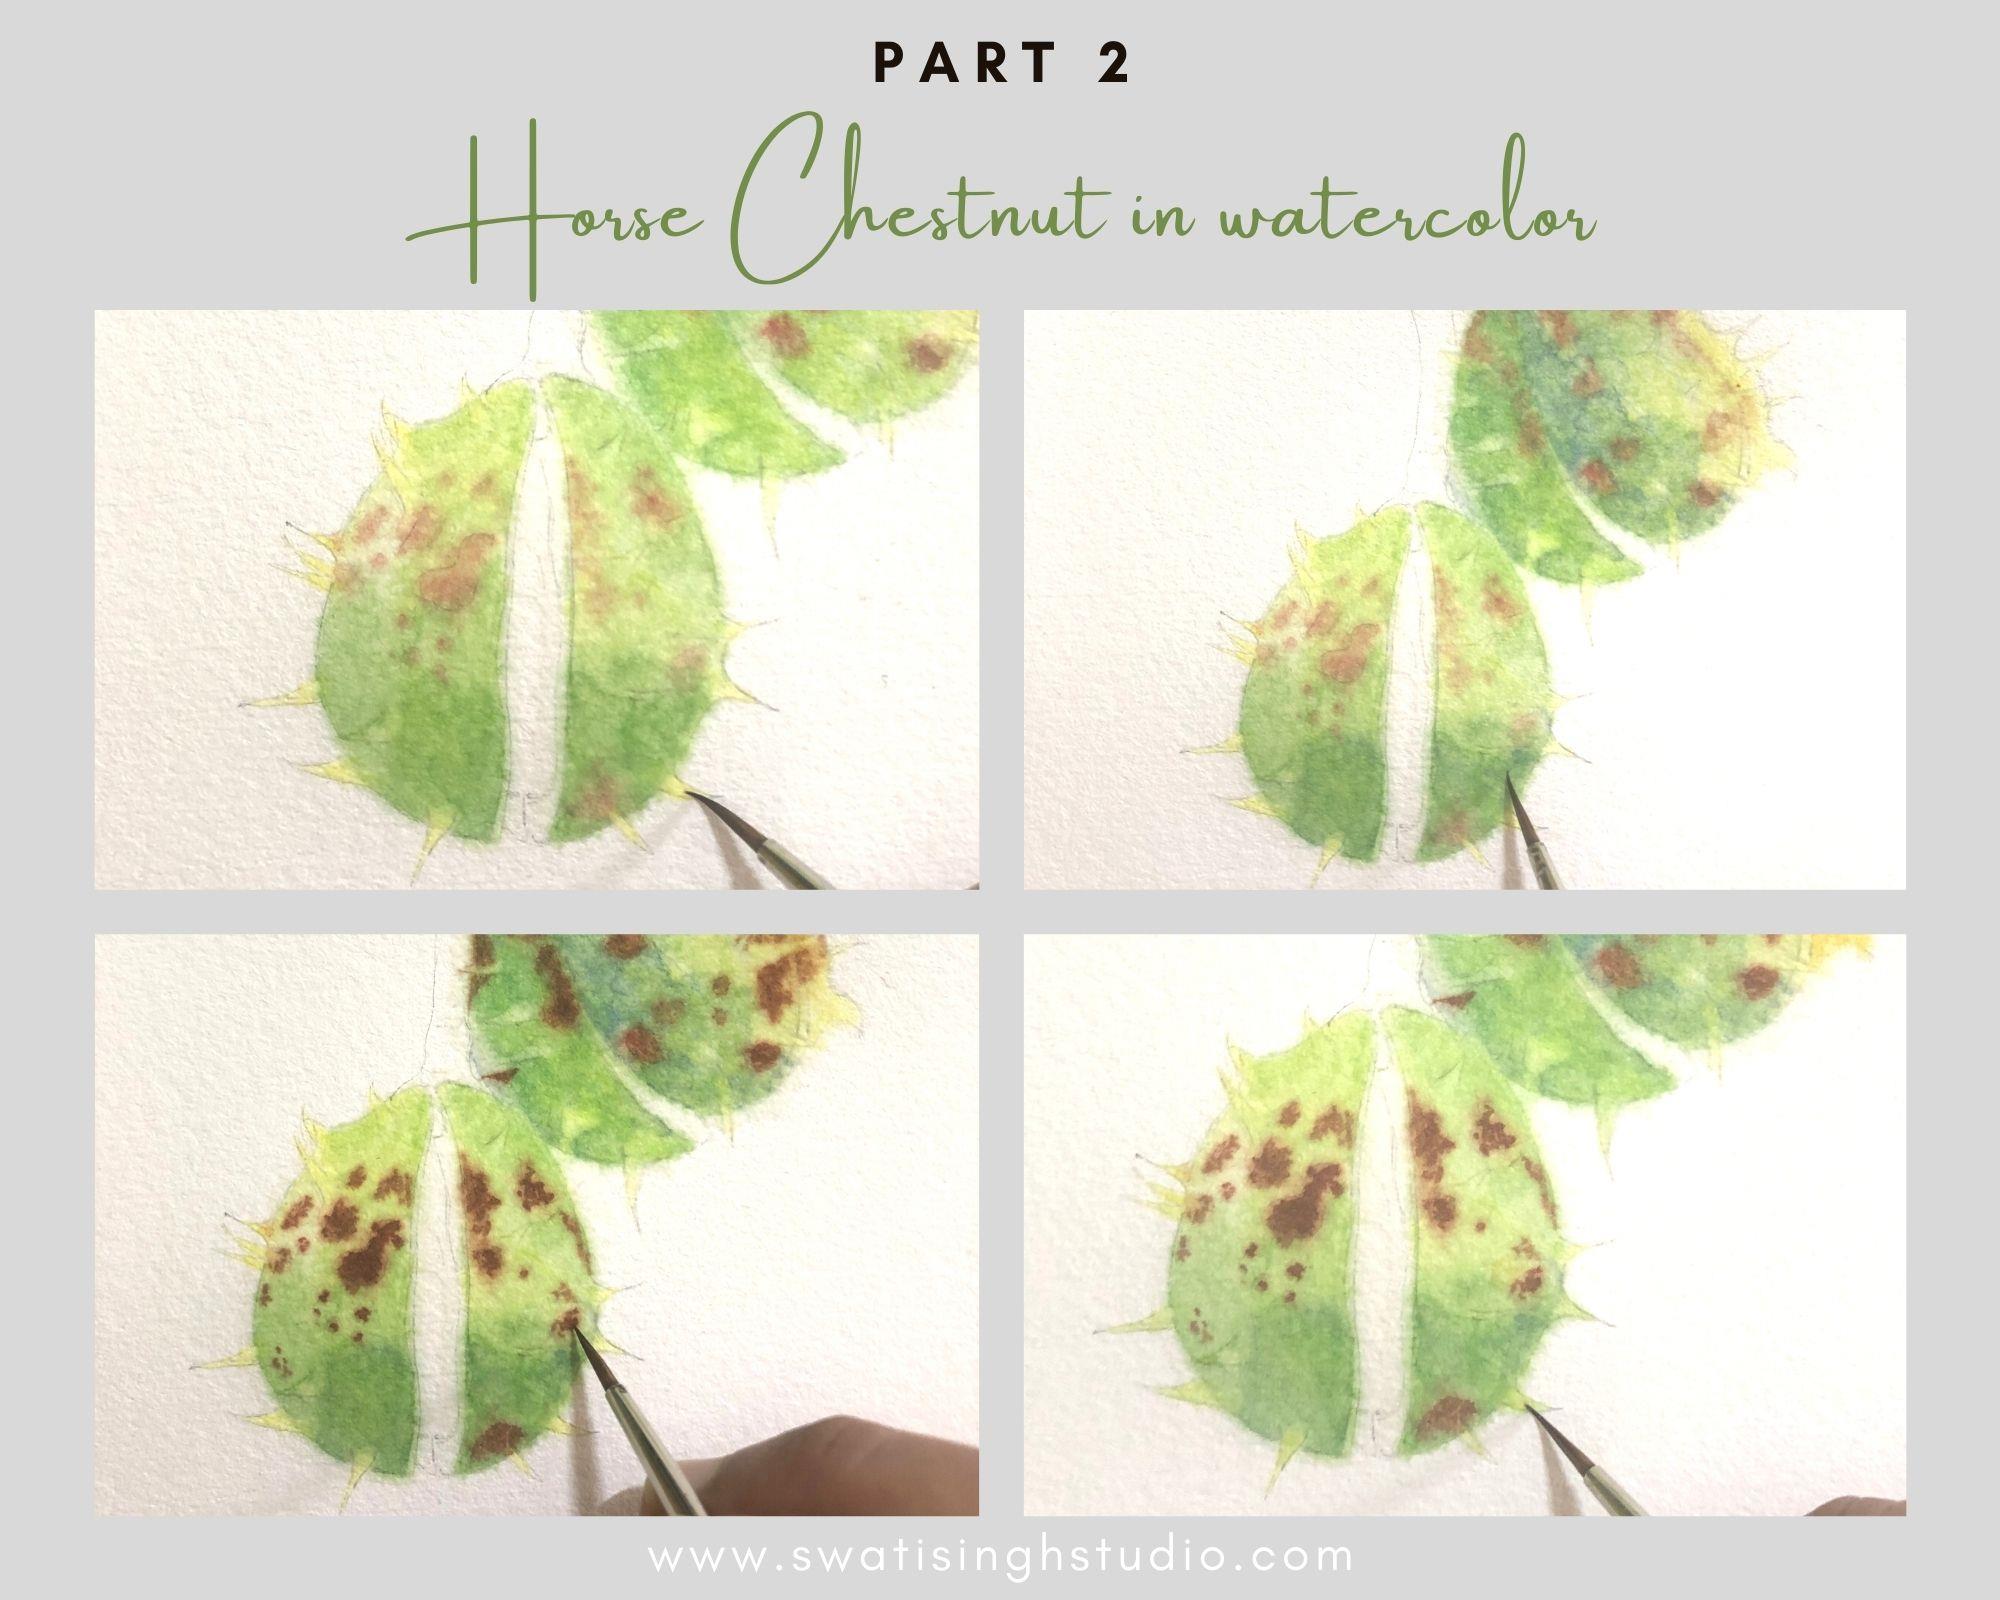
Step 5- Let’s take care of the spikes now. These tiny details make this subject interesting! With a #0 brush go in the spikes with a pale layer of lemon yellow. Since the area is so tiny we do not need to glaze it with water beforehand.
Step 6- While the spikes dry let’s add in some more shadows on the shell. This time we need to mix in some ultramarine blue to sap green for the shadow areas. This will make the color cool. Add a glaze of water before adding in the color for a smooth transition. Limit the color to just the darkest area on the shell.
Step 7- Darken the brown spots by adding burnt umber on top of the previously painted burnt sienna. Keep this color in the middle so that burnt sienna is seen on the sides.
Step 8- Add a pale layer of sap green over the spikes with a #0 brush.
PART 2- Seed and the stems
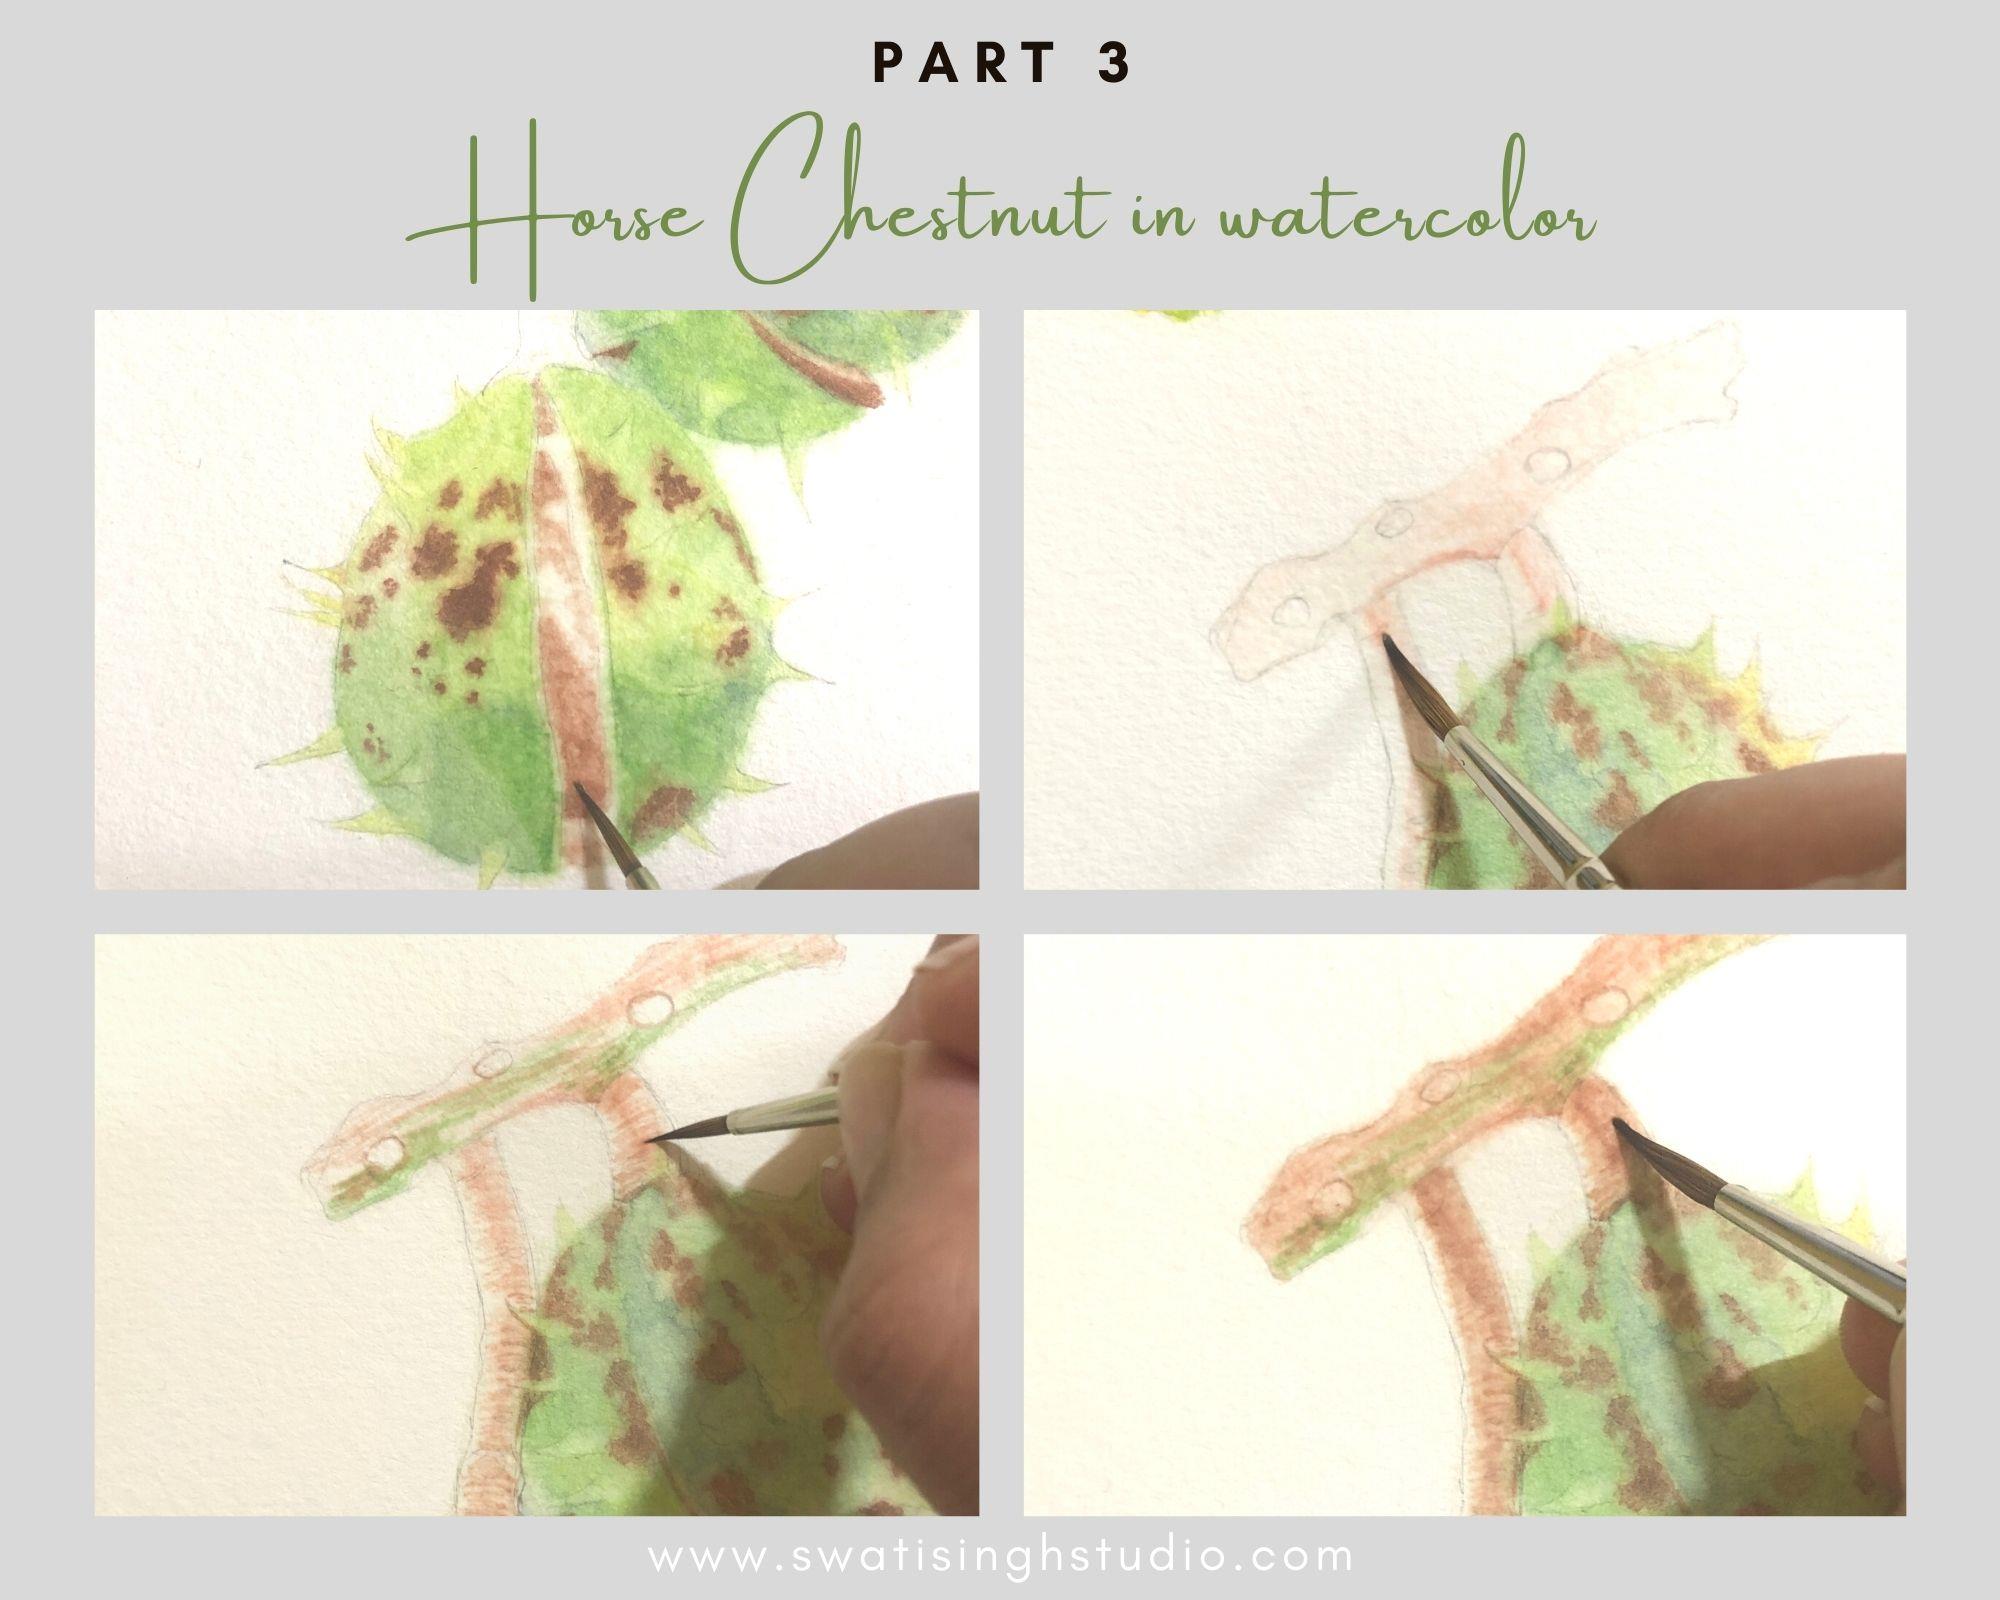
Step 9- Glaze the seed with a wash of clear water. Drop-in burnt umber with a #0 brush. Leave any highlights you see on the surface.
Important: There is a thin wall of white flesh on both sides of the seed. Make sure you do not glaze this area with water or else the brown will seep in and we will lose the white of the paper.
Step 10- I joined the two stems as I felt it looked incomplete. You may do so if you wish. Start by glazing the stem with clear water proceeded by a pale layer of burnt sienna using #2 brush. Move the brush along the length of the stem on the right side. Keep the left side untouched to suggest highlight.
For the stem running horizontally, move the brush left to right. I also added a touch of sap green here and there to make it look more interesting.
Step 11- The stems have some marks on the surface. Make these marks in burnt umber using a #0 brush as shown in the image. These marks also help in giving roundness to the subject.
Step 12- Once the details have dried completely, add in a layer of burnt umber.
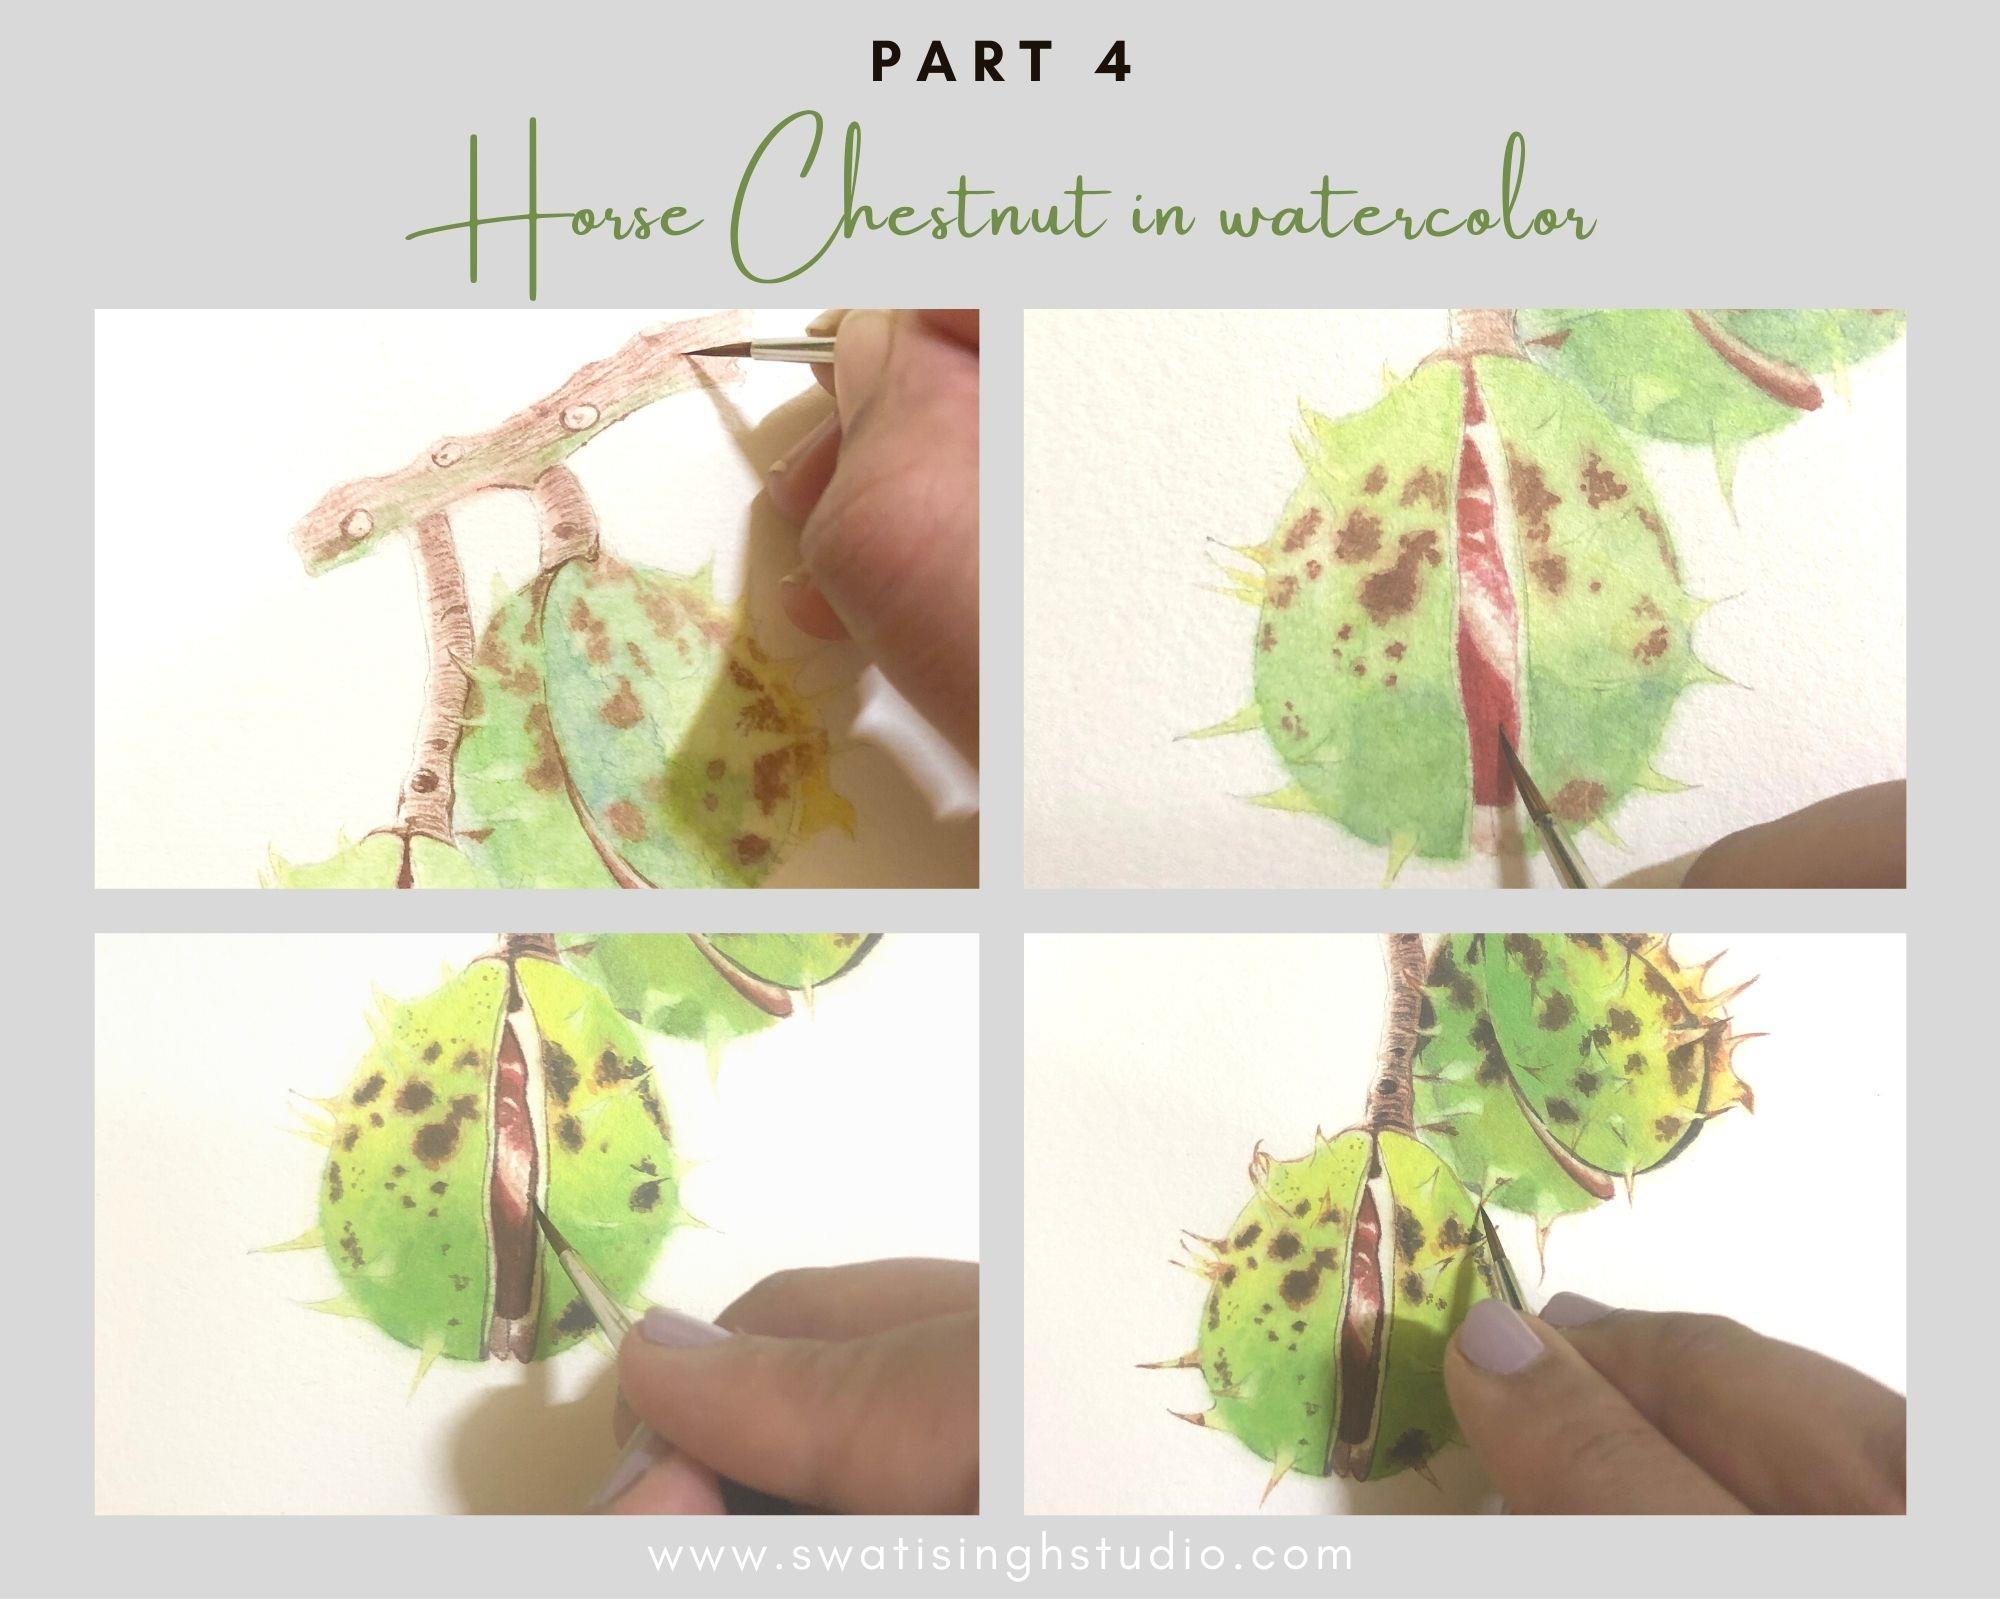
Step 13- Mix in some scarlet red with burnt umber to get a strong marron color for the seed. Apply this color on the seed with a #0 brush.
Step 14- Mix a tiny amount of ultramarine blue to burnt umber to darken the brown even further. Using a #0 brush darken the fine marks on the stems.
Step 15- After strengthening the colors some more with a few added layers, now it’s time to work on the fine details we see inside the fruits. Start by outlining the skin with a fine #0 brush in burnt umber. Keep the lines very thin or else you might lose the white skin completely.
Step 16- Next define the spikes a little further. Apply burnt sienna to the tips of all the spikes with a #0 brush.
Step 17- Add some final details like tiny brown spots on the skin and we are done!
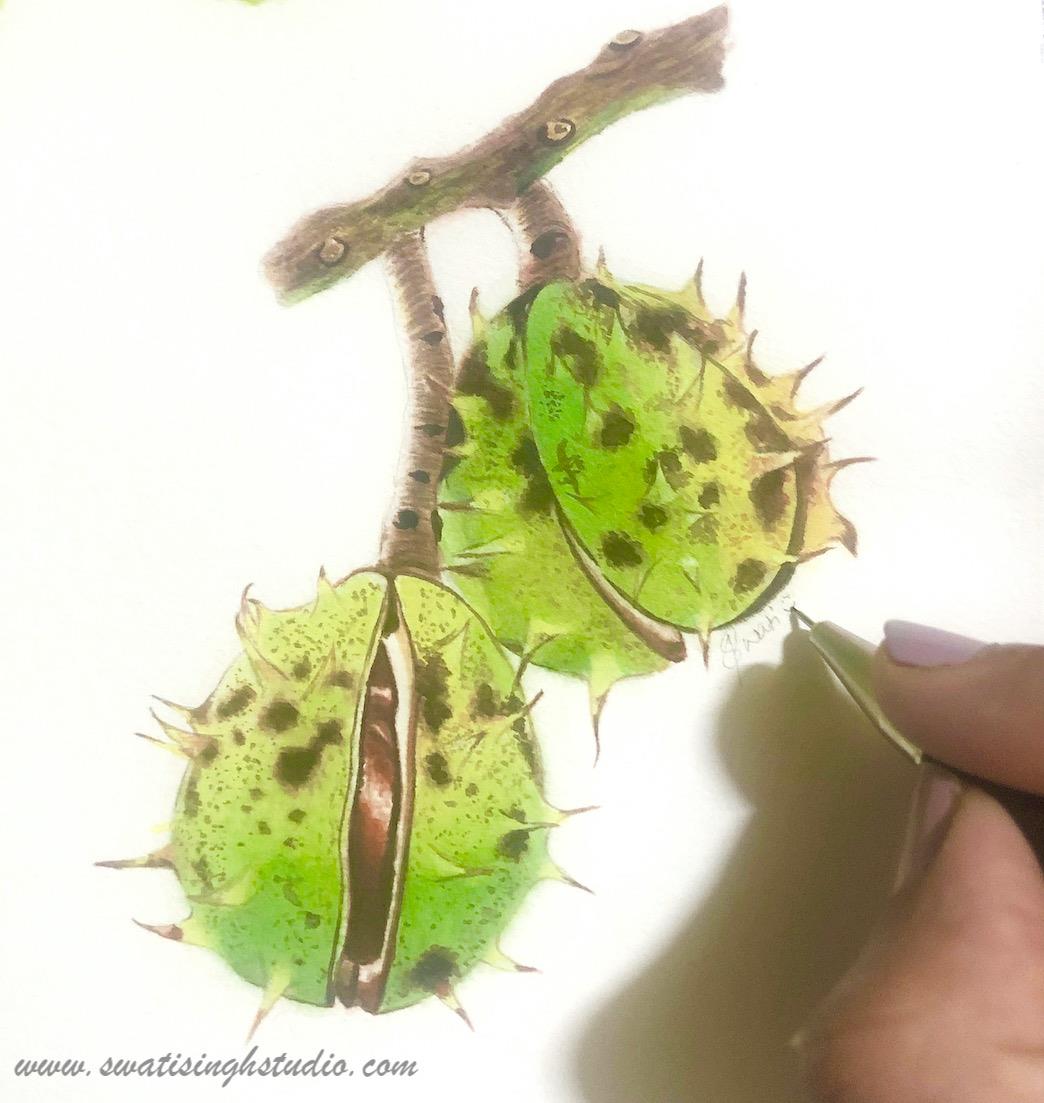
Painting this hardy fruit was so much fun! I am sure you will love painting it too. Feel free to email me your progress image and I will be happy to guide you.
Here are some more suggestions for the fall season which we painted previously. Feel free to explore them too.
Apple in watercolor
Indian Corn in watercolor
Pumpkin in watercolor
Acorns in watercolor
Oak leaves in watercolor
Mushroom in watercolor
I will be back with yet another tutorial soon. Till then …
Happy painting!