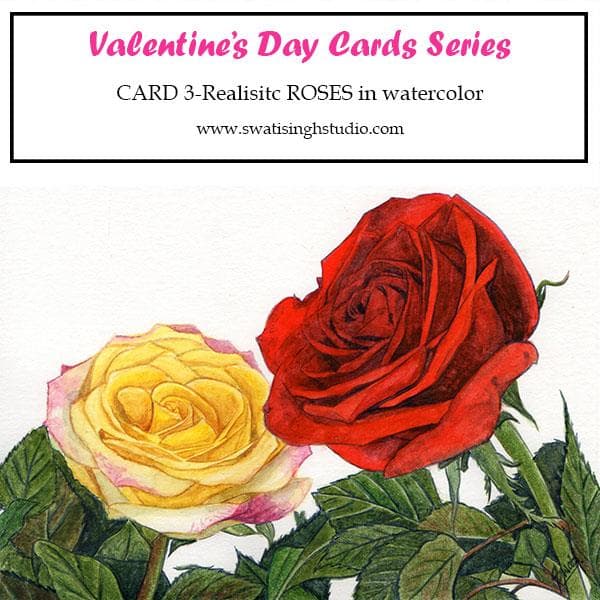
Hello, everyone. How are you all doing!
Do you know the favorite flower of Venus, the Roman goddess of love?
The red rose, of course. The bud stands for strong romantic feelings, so it's no surprise they make up the most popular Valentine's Day bouquets.
Roses definitely add beauty to the celebration. They are my personal favorite too.
Below is a picture of a bunch of roses my darling hubby got me on our anniversary. I just can’t put in words the beauty of the velvety red rose in particular. It is glowing like a fine Burmese ruby!
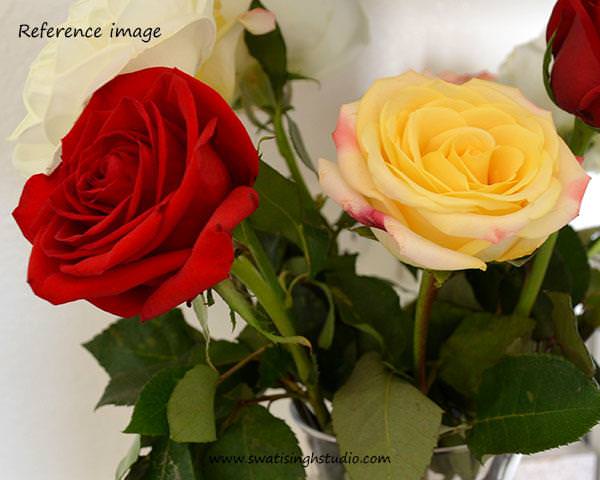
So I thought why not paint these on a card this week. I changed the composition a bit to make it look more balanced.
The watercolors I used are the following
1. Lemon yellow
2. Permanent rose
3. Cadmium yellow
4. Yellow ochre
5. Cadmium red
6. Indigo blue
7. Sap green
8. Burnt umber
9. Thalo green
To know about this series and other materials required you may refer to this POST!
Let’s start painting!
PART 1- YELLOW ROSE
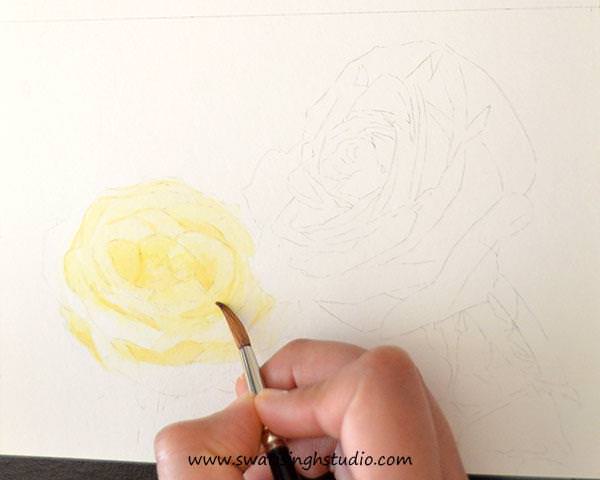
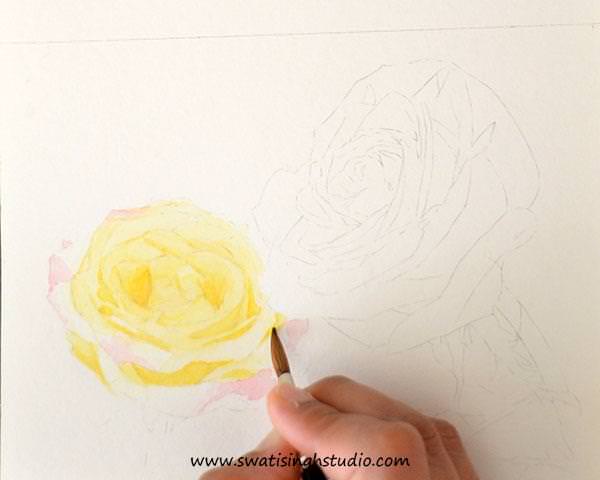
Step 1. Lightly glaze the yellow rose in lemon yellow as shown below. Just leave the outer petals white as they are very light in color.
Step 2. Now add a touch of permanent rose to the edges wherever needed.
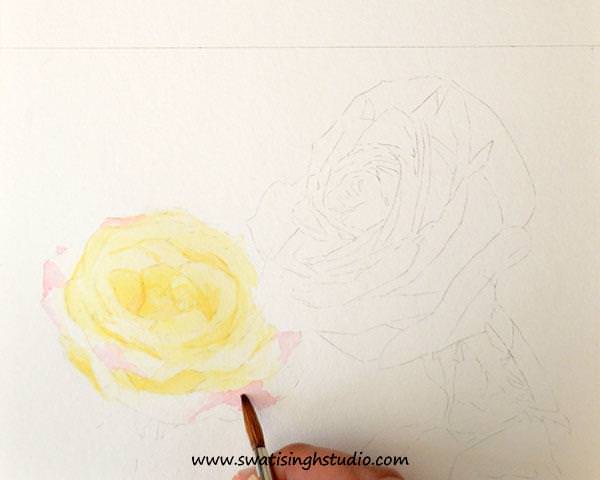
Important: Just be careful, Permanent rose is a very staining color. Hence, use a very thin layer.
Step 3. Once the pink gets dried add a glaze of cadmium yellow in the shadow areas as shown below.
Step 4. Now it’s time to give the petals some finishing touches. Lightly outline the petals with a thin brush such as no 1. in yellow ochre. This will help the petals stand out individually!
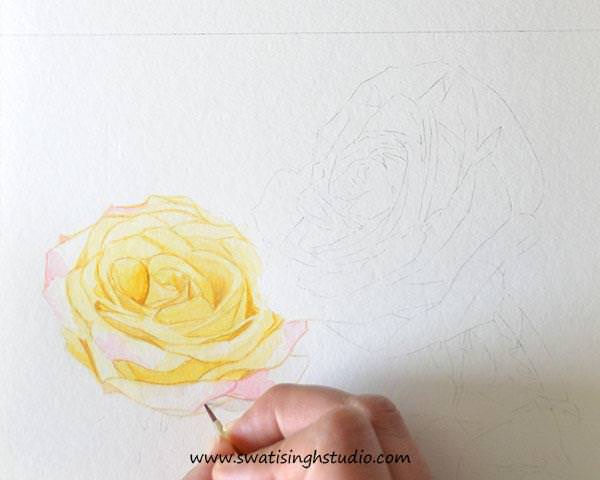
Step 5. Just repeat the above layers once more in the given order and you will have your yellow rose ready in no time!
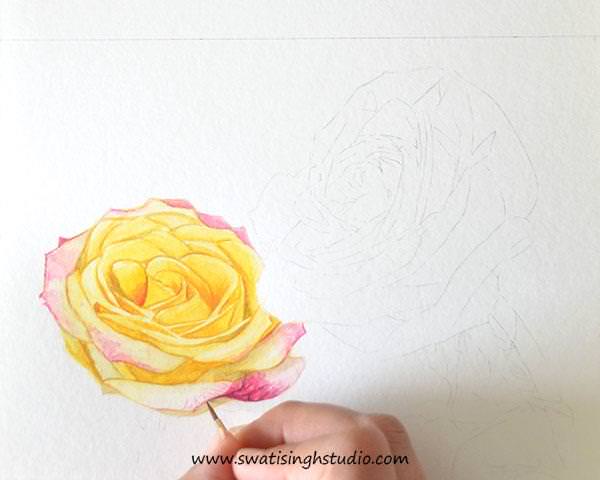
PART 2- RED ROSE
Step1. This rose is comparatively very highly saturated in color as compared to light yellow one. Hence, we can go ahead and apply a good amount of cadmium red in the first layer itself.
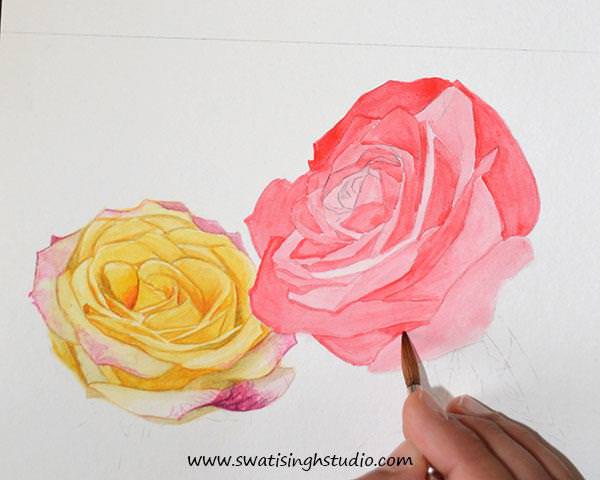
Important: Paint individual petals separately. Since the color is almost opaque and dark, you risk losing the outlines in the process. Hence, keep the petals separated by keeping a little tonal difference in the individual petals.
Step 2. Now prepare a darker shade of red by mixing a little amount of indigo blue to cadmium red.
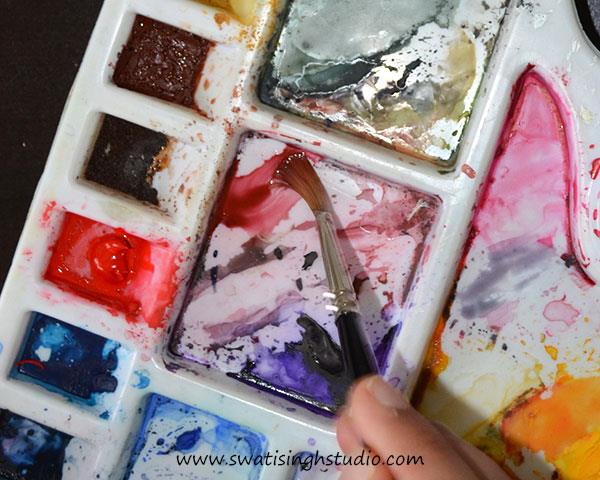
Add this color to the shadow areas as shown below. The shadows make it easy to clearly see various parts of the flower.
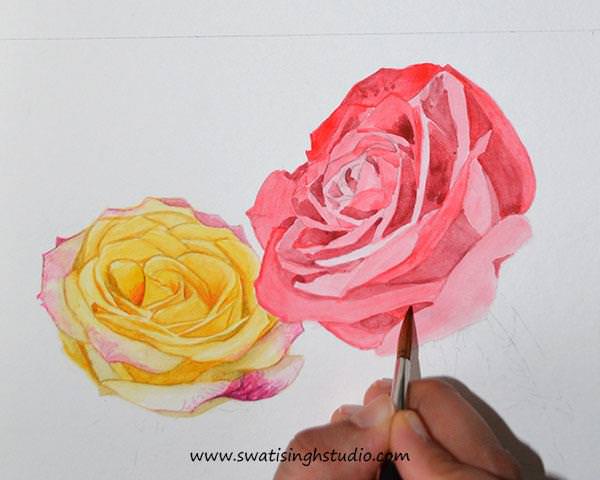
Step 3. Prepare a mix of cadmium red and cadmium yellow to get a slightly orangey red color. Keep in mind the folds of the petals when you paint. Run your brush in the direction of the fold for a natural look.
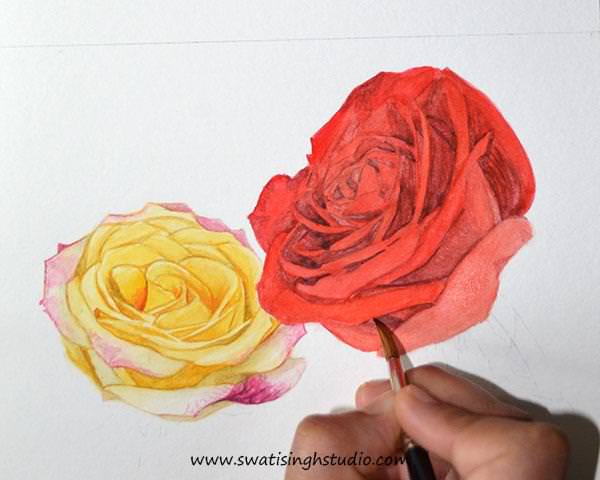
Step 4. This is what it looks like after two more layers in the order above.
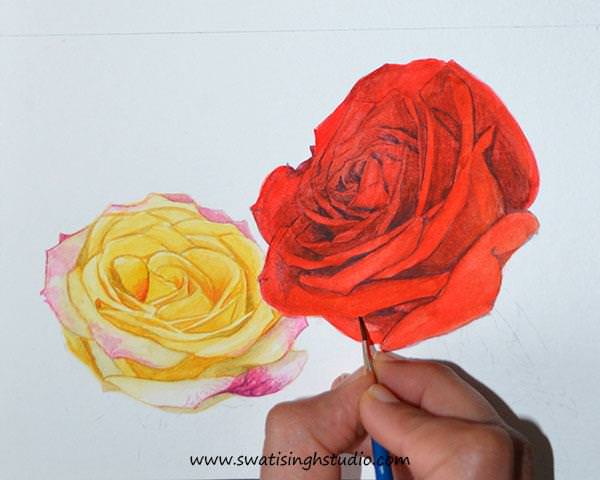
PART 3- LEAVES
Step1. Apply a thin layer of sap green to all the leaves.
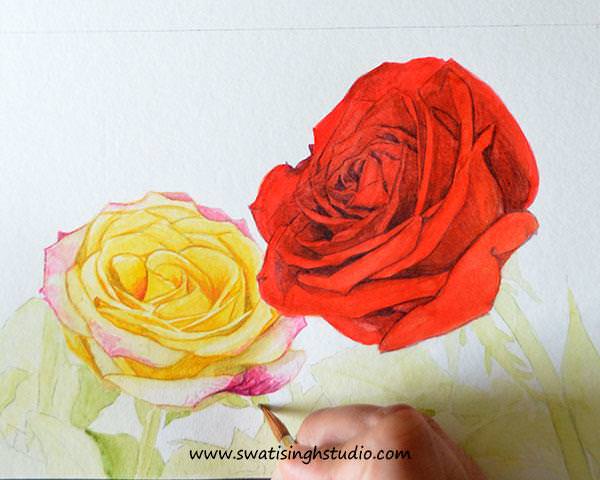
Step 2. I outlined and added veins to all the leaves with an HB pencil.
Also, add a slight touch of burnt umber to the stems as shown below.
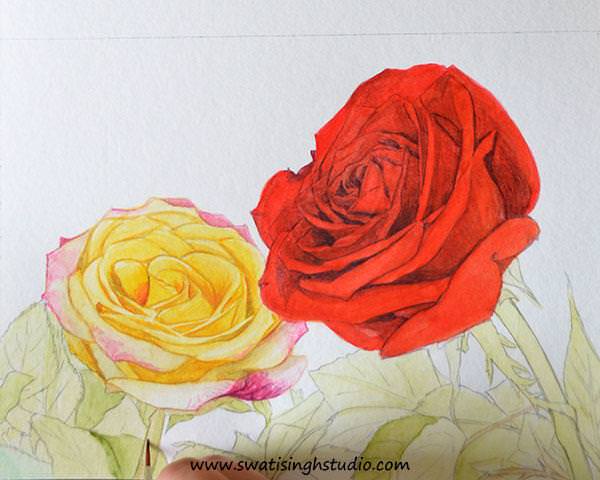
Step 3. Prepare a mix of Sap green and just a tiny amount of Thalo green. Keep in check the amount of Thalo green you add. Try to use it sparingly as it is a very strong staining color.
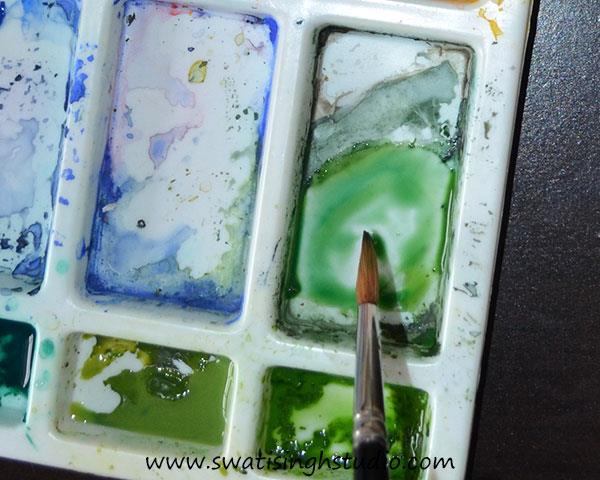
Apply this shade of green to the leaves as shown below.
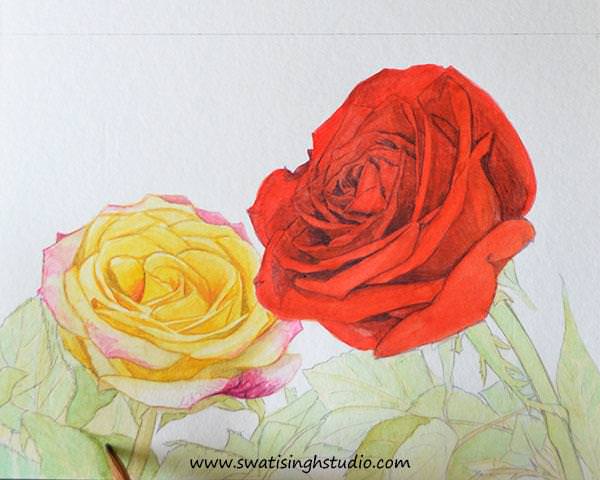
Step 4. Now add some indigo blue to sap green for a darker shade of green. Apply this color to the shadow areas (the darkest areas).
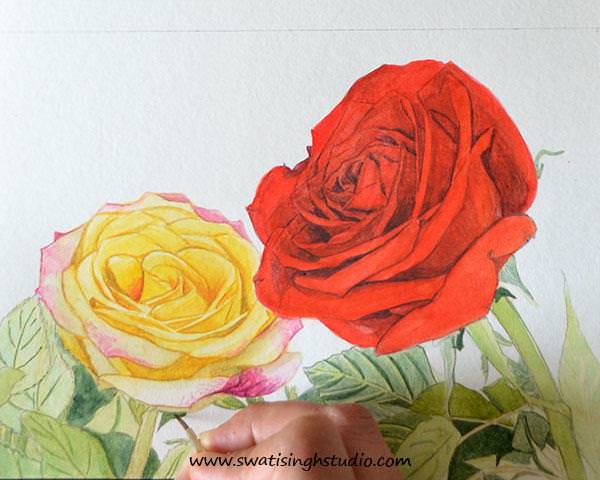
Step5. Now simply repeat the above steps and add some more layers of colors. This is what it looks like after a few layers of greens.
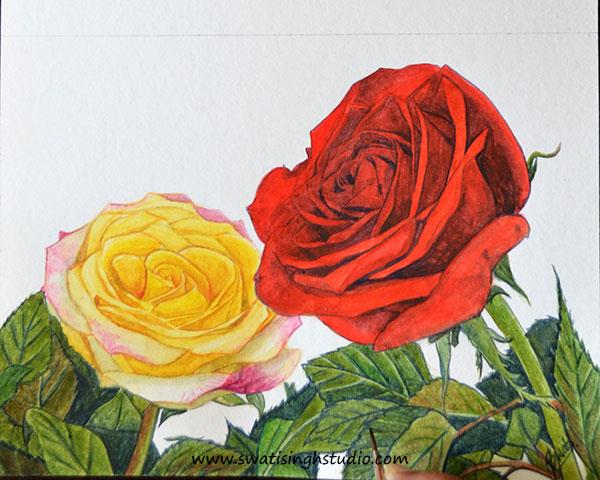
Tip: To make the leaves look a bit more interesting I varied the greens and also added a hint of red to a few leaves! Also, give the final finishing to all the veins with a fine brush such as no.1 in indigo blue.
So here you are with two roses in watercolor. I hope you liked this tutorial! If yes then do not forget to SUBSCRIBE! You may also share your cards with me through e-mail or on my FACEBOOK PAGE. I will be back with the last card in the series on Saturday. Till then
Happy painting
Swati