Did you know?
That cherries were a prized food in a region of China dating back to 600 BC – fit for royalty and cherished by locals.
Hello, everyone! Welcome back to my blog.
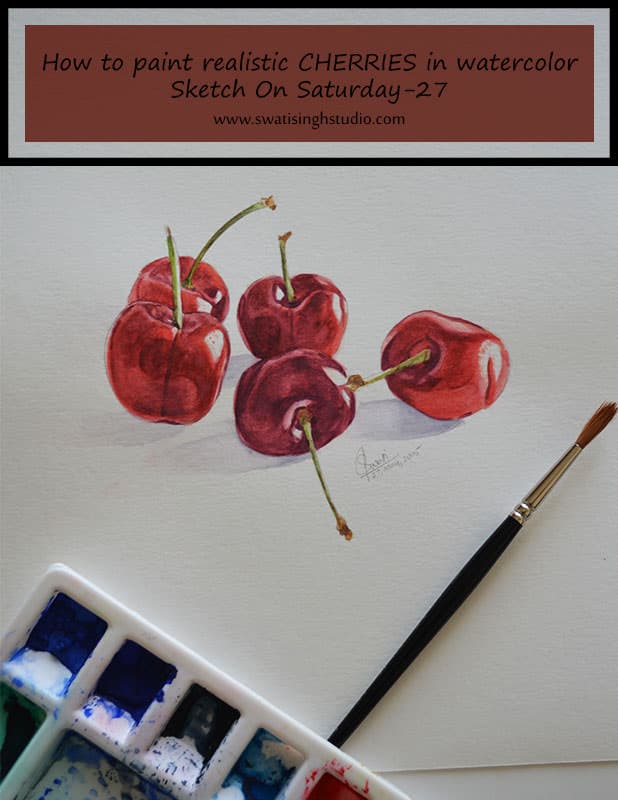
Today I have the seventh sketch in the “Fruits” series- Cherries!
Why did I choose this fruit?
Well, cherries are only available for a limited time during the year. They are available in the stores right now and I couldn’t resist buying a BIG box full of these this weekend! So after nearly emptying the box, I somehow managed to save a few to paint!
Below you can see the breakup of the photo I took. It is important to remember the direction of light when we paint.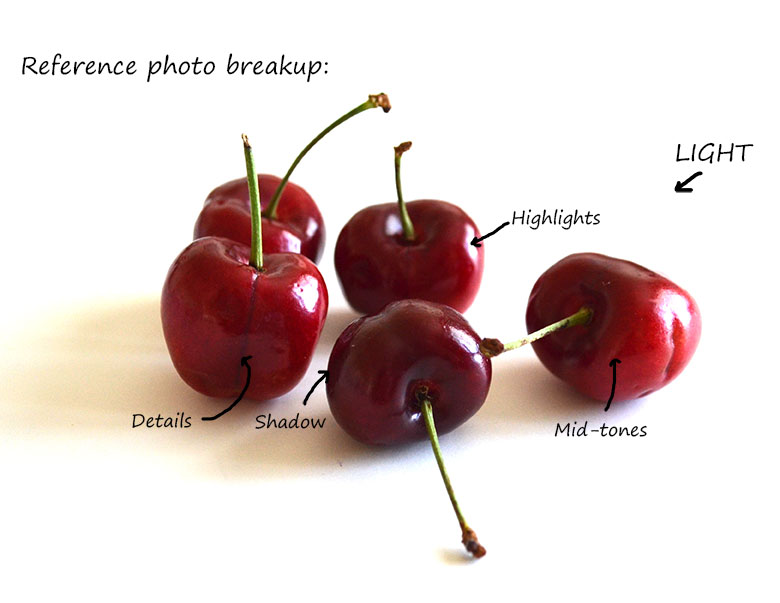
Initial drawing is done using a 2B pencil.
Painting cherries does not require a lot of colors. The watercolors I used are:
1. Cadmium red
2. Ultramarine blue
3. Lemon yellow
4. Sap green
5. Yellow ochre
6. Burnt umber
If you are new to the series you might want to check some more useful materials required HERE!
So let’s begin!
Step1: Give a wash of clear water using a no.5 brush inside the cherries.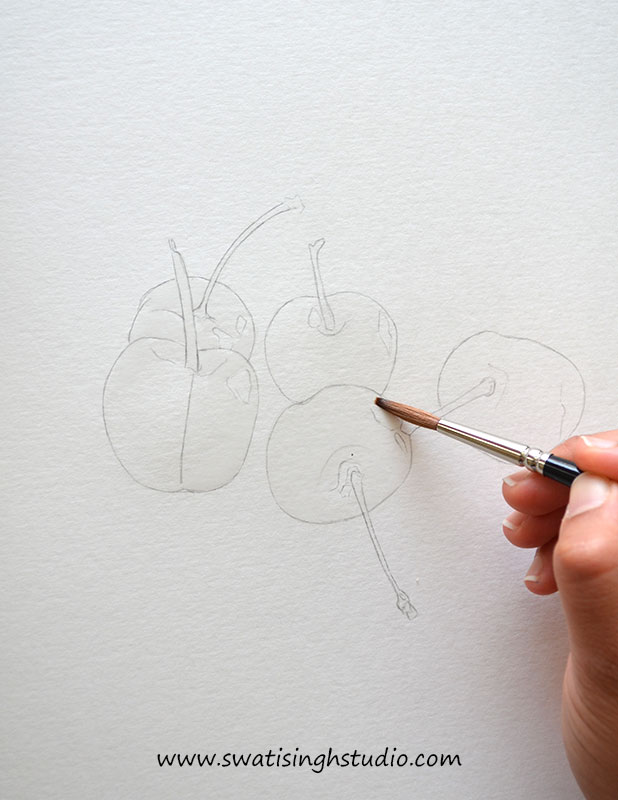
Important: Do not touch the highlights.
Step2: Now give a very light wash of cadmium red without touching the highlights.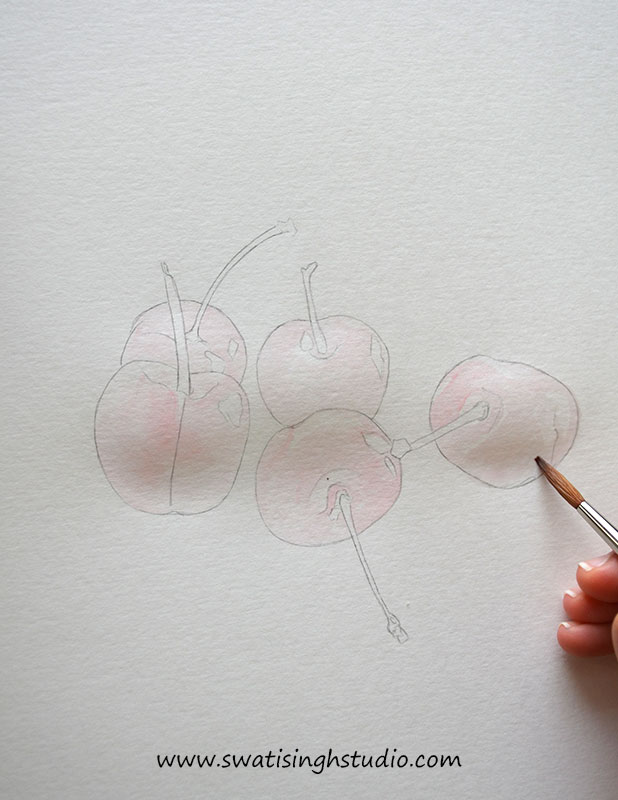
Step3: Repeat with another layer of cadmium red, keeping a close eye on the tonal values you see in the reference image.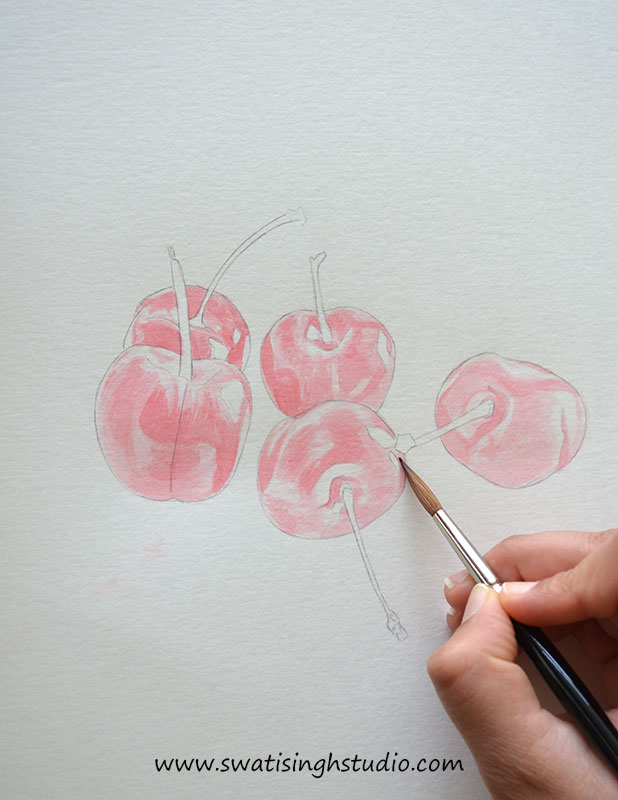
Important: The direction of your brush marks matter. Try to paint in the direction of the fruit surface.
Step4: Prepare a darker shade of red by mixing some ultramarine blue to cadmium red as shown below.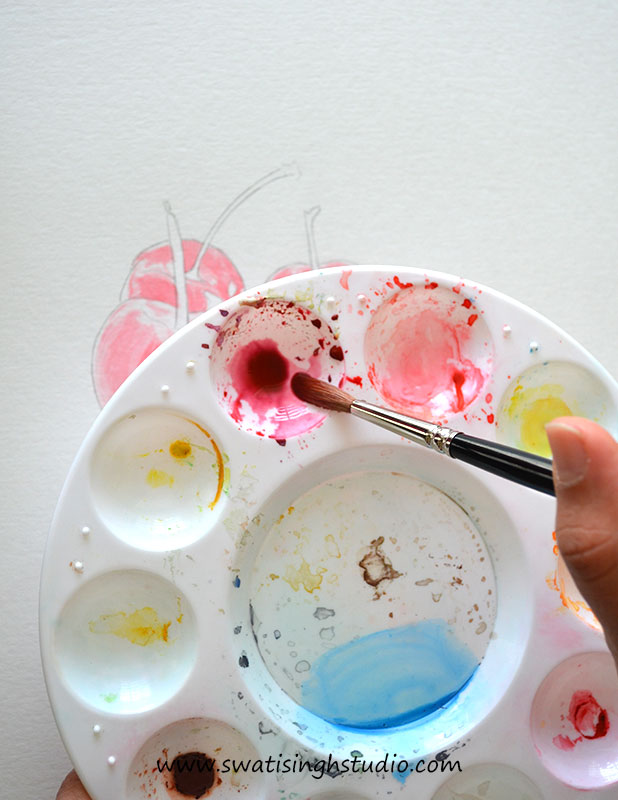
Now add darker tones with this red using a number 3 brush.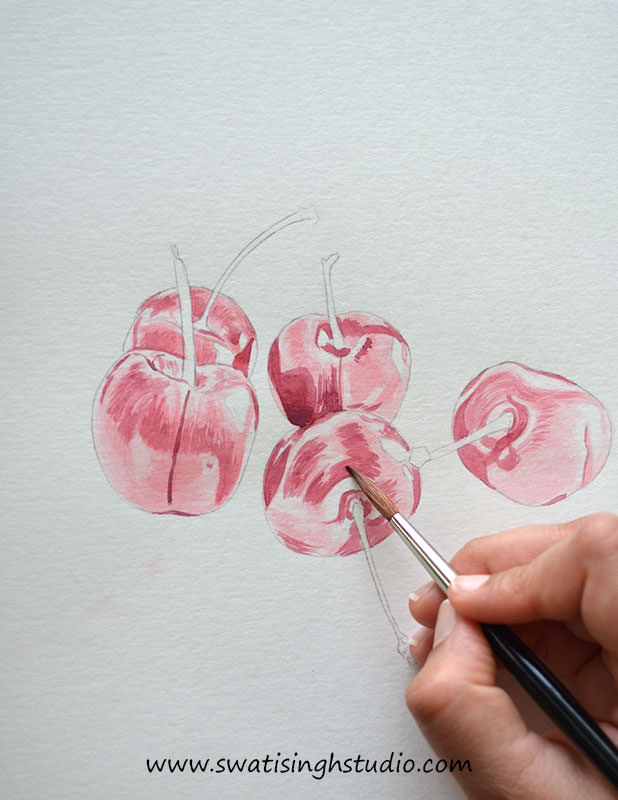
Step5: Give a light wash of cadmium red to bring everything together. You can go ahead and tone down a few highlights with the wash as I did. But let the strong highlights remain white.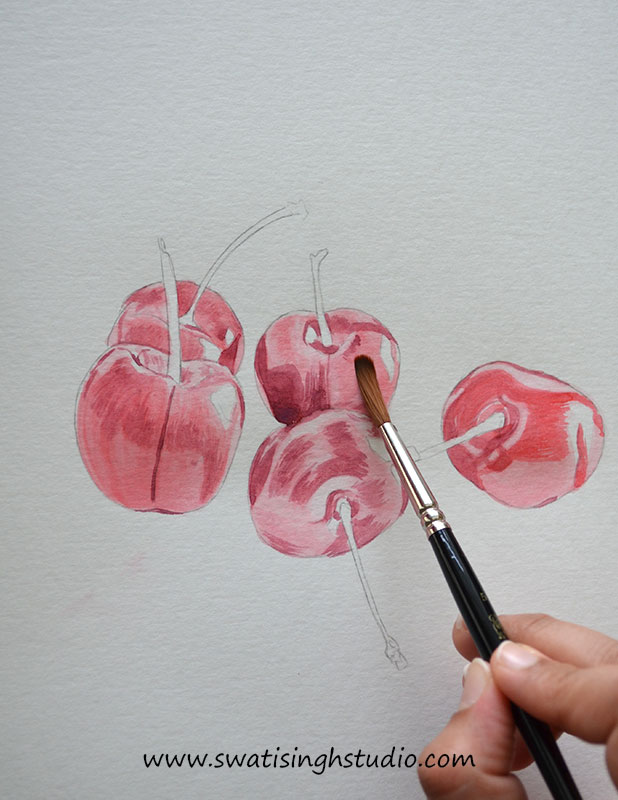
Important: Let it completely dry before proceeding to the next step.
Step6: As you can see some cherries are bright red in color and others are a bit darker. Hence, to give brightness to the red ones go ahead and add a light wash of lemon yellow.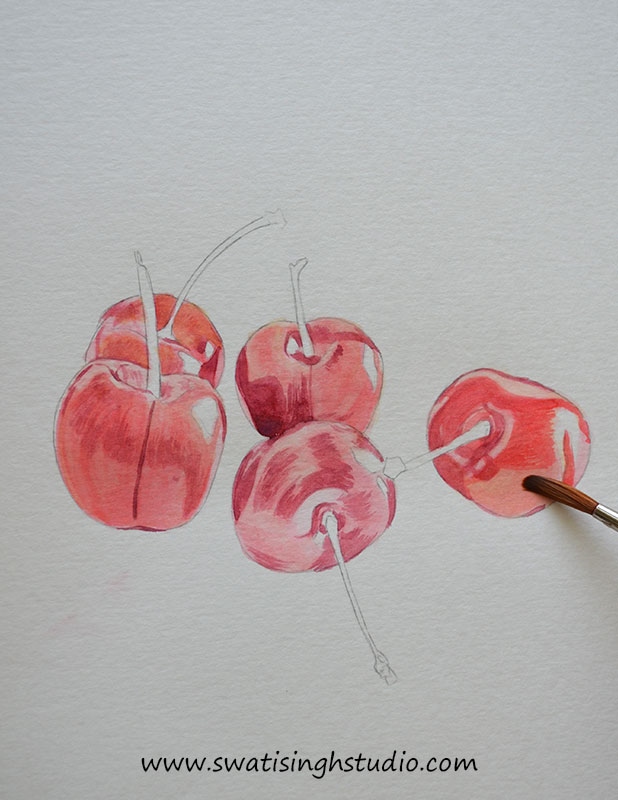
Step7: Add a hint of blue to cadmium red and darken the cherries with the same. Take a close look at the reference image and darken all the shadow areas on the cherries.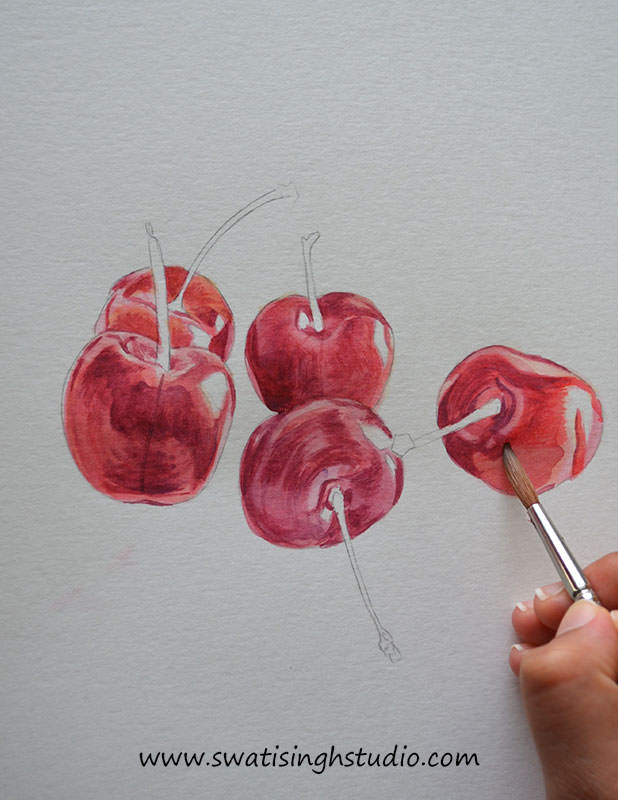
Important: Let it completely dry before proceeding to the next step.
Tip: You can go ahead and change the water in the container if it has turned muddy.
Step8: Now moving on to the stem. Give a light wash of sap green using a number 3 brush.
Carefully add yellow ochre on the tips and darken with burnt umber as shown below.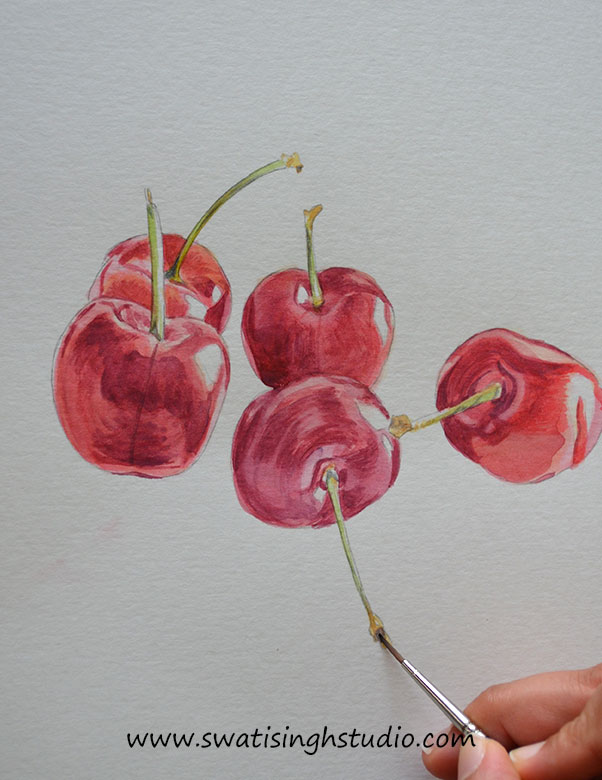
The overall stems are very light green in color hence we do not need to add a lot of layers to them.
Step9: With the basic sketch complete, now it’s time sit back and evaluate the overall tonal values. Add in the darker shade of red wherever required. This will help the cherries gain depth. Or you can just leave the cherries as it is!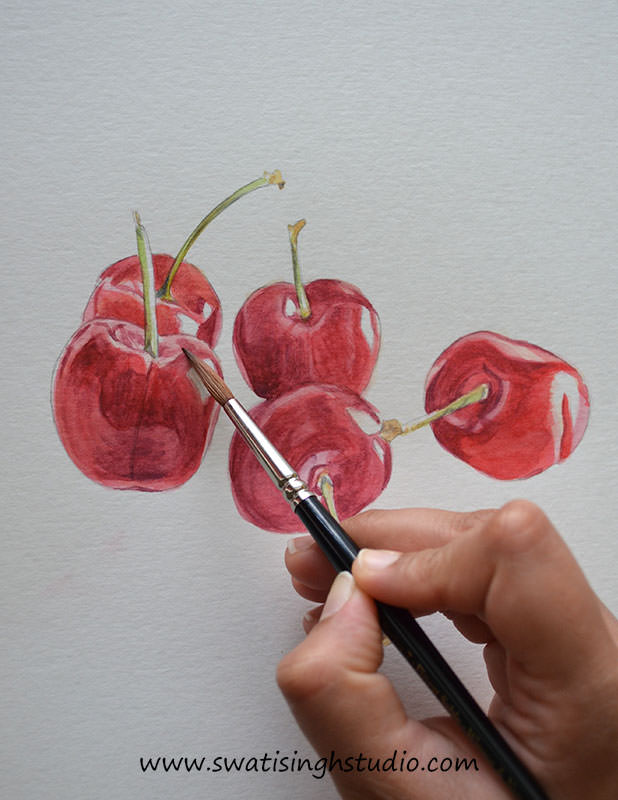
Step10: Do not forget to add your glorious signature!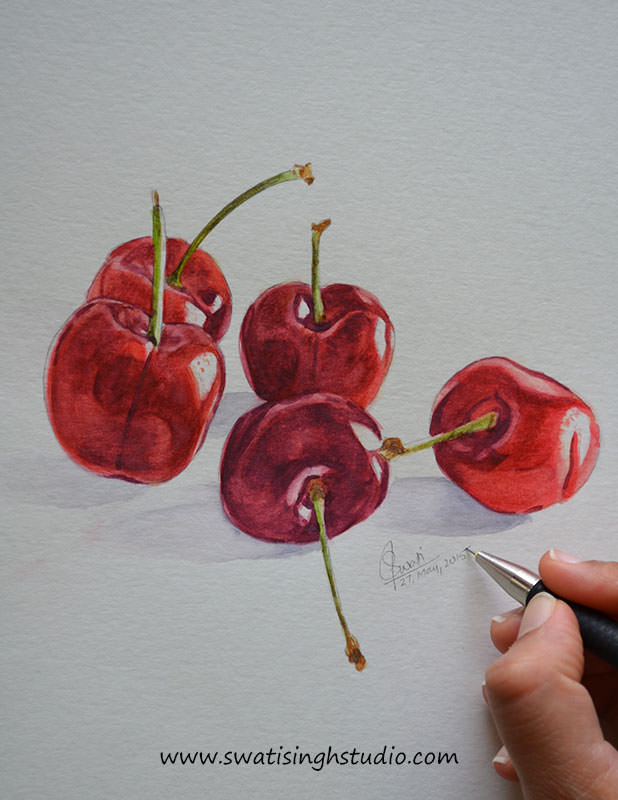
And viola we are done!
I enjoyed painting these delicious cherries. Hope you would too. I will be back with another fruit next Saturday.
If you liked this tutorial kindly “SUBSCRIBE” to my blog and stay updated with all the future posts.
I hope you will try the cherries at home and enjoy painting this lovely fruit. If you have any questions you can write to me in the comment section below. I will be more than happy to answer!
Happy painting
Swati