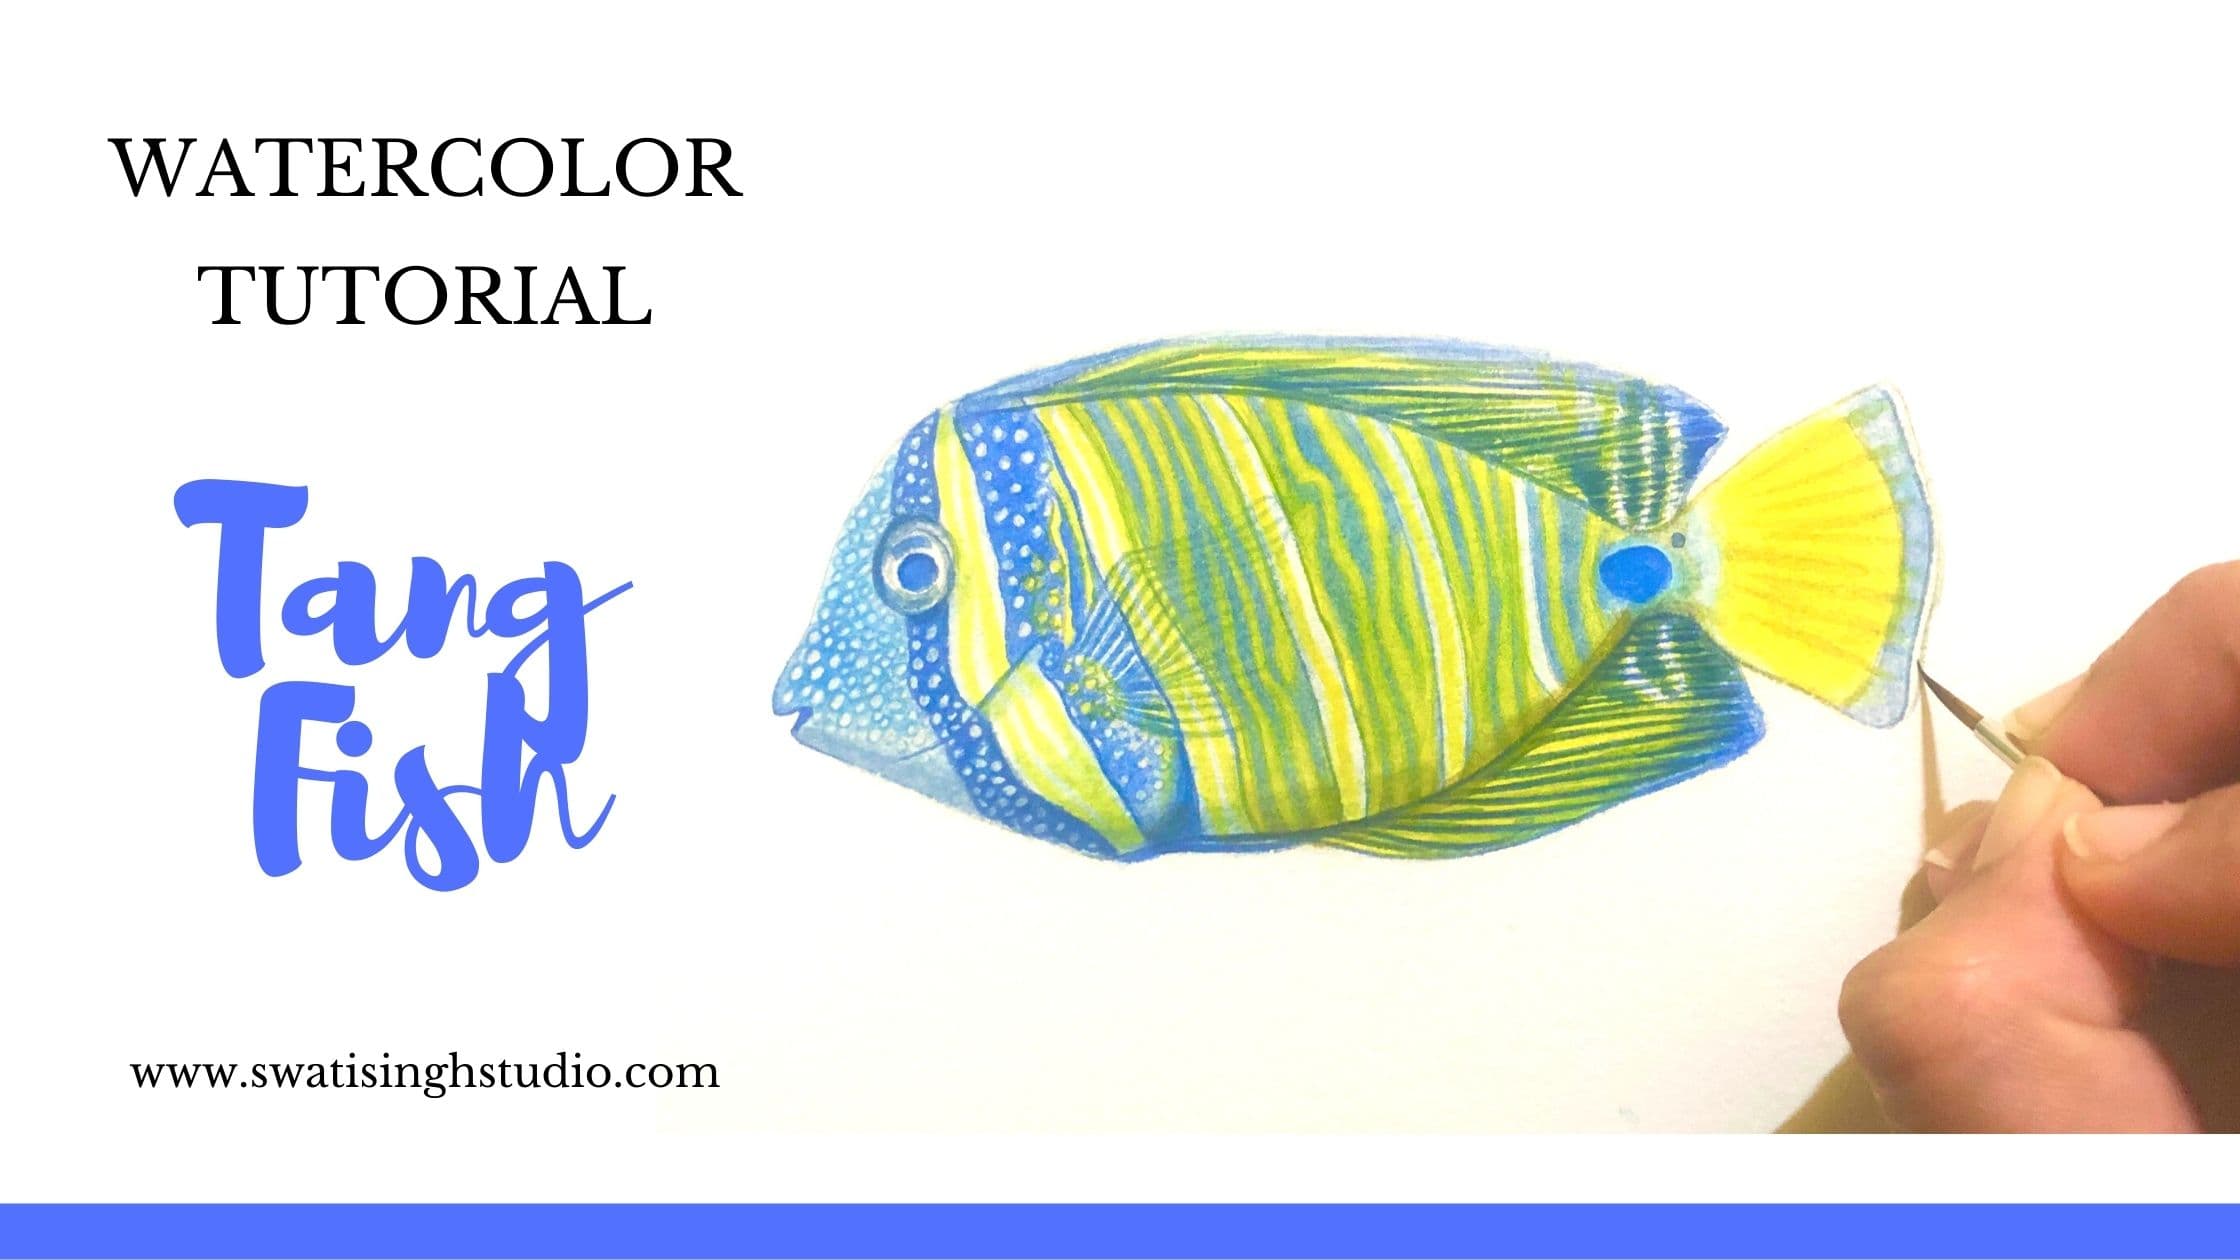
This is my first time painting a fish. And I must say I truly enjoyed painting it. The subject for today is Sailfin Tang. Now I must sound quite professional saying its name but to be frank my knowledge of fishes is quite poor. And I spent an hour searching for its name on the internet! Yes, you heard me right.
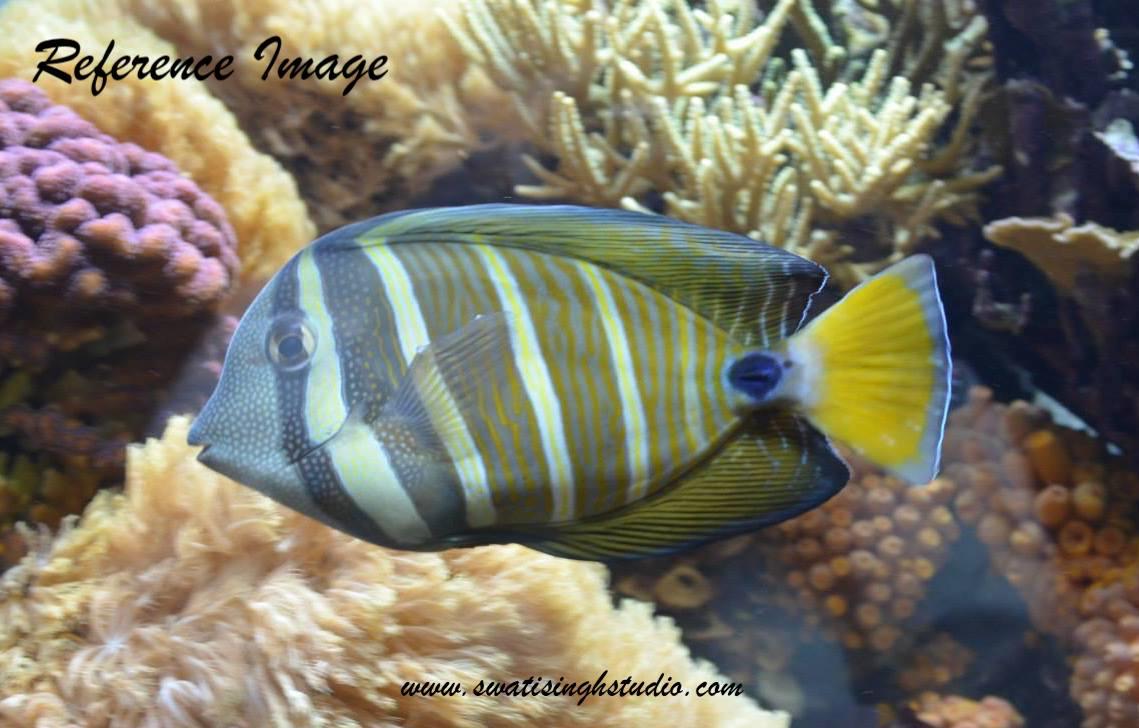
I clicked this beautiful fish during a visit to Shedd Aquarium in Chicago a few years back. I instantly fell in love with this one and clicked a photograph right in time before it quickly made a turn in the aquarium. Talk about photography skills!
Have you been to Shedd Aquarium? Let me know in the comment section below. I recommend visiting it if you love marine life.
I forgot all about it and came across this photo while flipping through a photo album. And here I am painting it for you now!
Reference Image
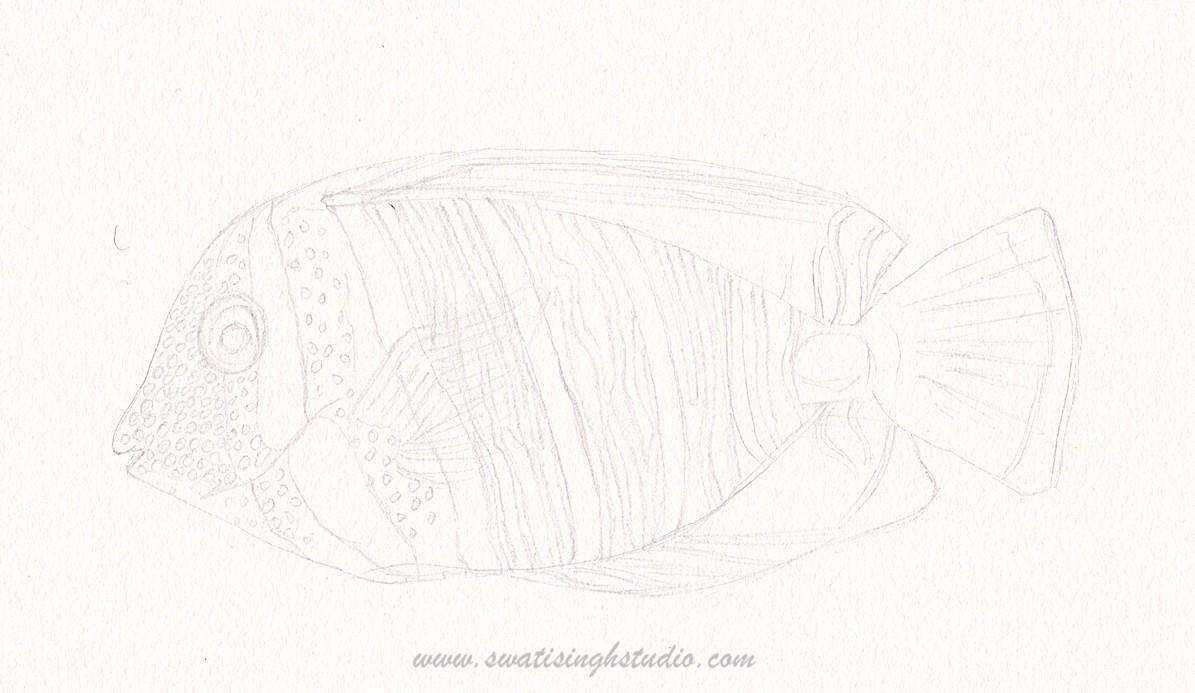
The Drawing
I have outlined the individual stripes of blue and yellow we see on the fish along with the tiny circles near the mouth. You may opt to not outline them if it confuses you. It is totally up to you. But drawing them beforehand surely helps when we paint.
Also, I am painting it at a very small scale. If you feel it will be cumbersome to paint such tiny details you may enlarge the image when tracing. Just make sure to draw it with a very light hand.
We are going to be mixing many shades of blue for painting this subject. It is surely going to be a learning of its own.
Watercolor Brushes : # 0 and # 2
The Watercolors
1. Cerulean blue
2. White (optional)
3. Cobalt blue
4. Burnt umber
5. Ultramarine blue
6. Lemon yellow
The Method
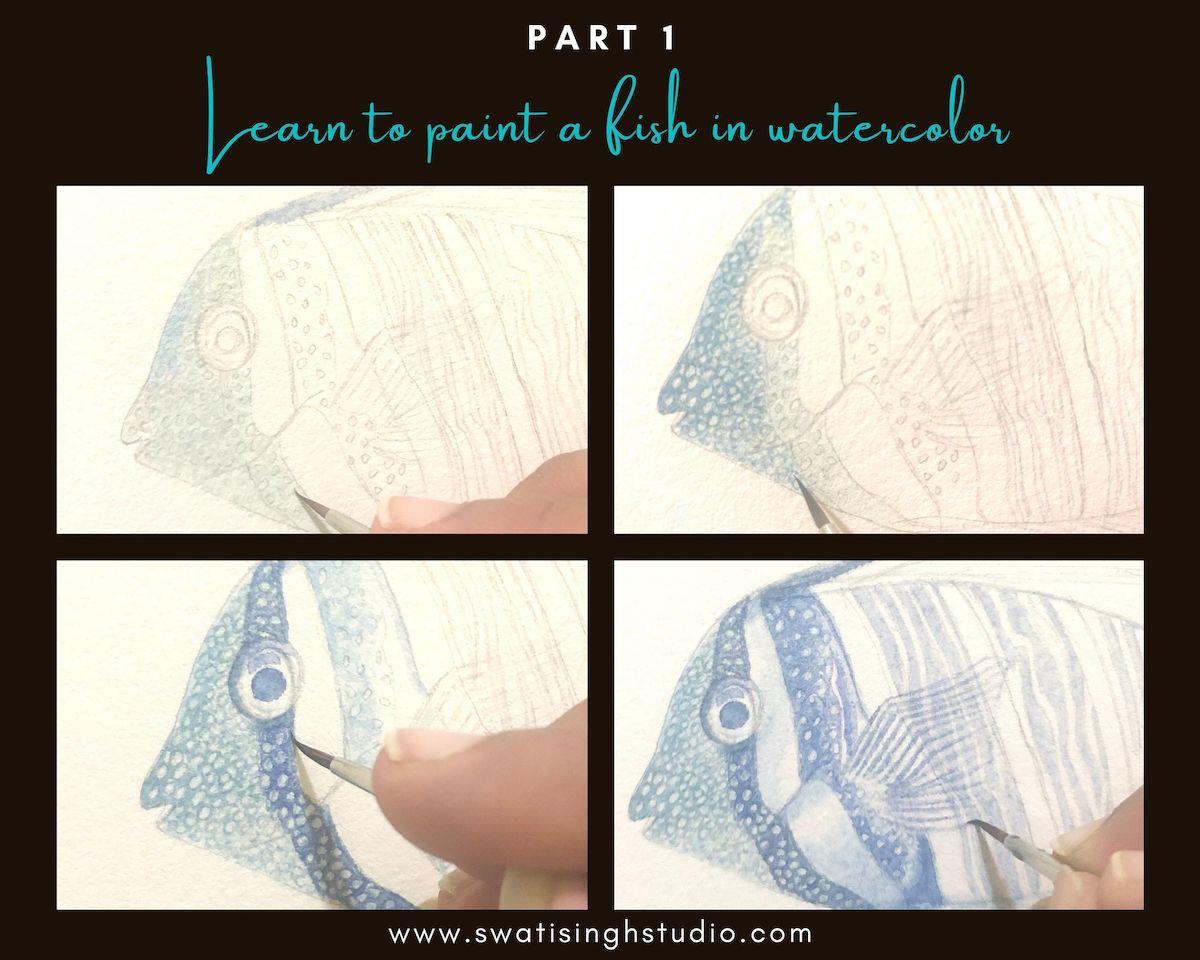
Step 1 - I mixed some white to cerulean blue to tone down the color a bit since it is a very strong hue. You may opt to omit to add white color if you feel and instead mix it with some extra water to make it pale.
Apply this pale color on the mouth area of the fish where we see the tiny bubble-like patterns. Go around the eyes without touching it.
Step 2- Mix in just a hint of burnt umber with cobalt blue. This will create a dark blue shade. With a very fine #0 brush outline the small bubbles we see near the mouth. Go around the bubbles carefully! Take your time painting it. I have a small clip of the procedure posted on my Instagram account where you can see me paint this section in real-time. Feel free to check that out!
Step 3 - Now while the front part of the fish dries we will move on to the blue vertical bands. For this, I am using a pale mix of ultramarine blue. Again, you need to be careful around the eyes and the small circles we drew earlier. Use the same #0 round brush.
Step 4 - Go ahead and add some shadows to the adjacent band with dilute ultramarine color as shown in the picture. This will help give it some form. Also, outline the pectoral fin with the same color as shown in the picture. The same color is good for the eyes as well.
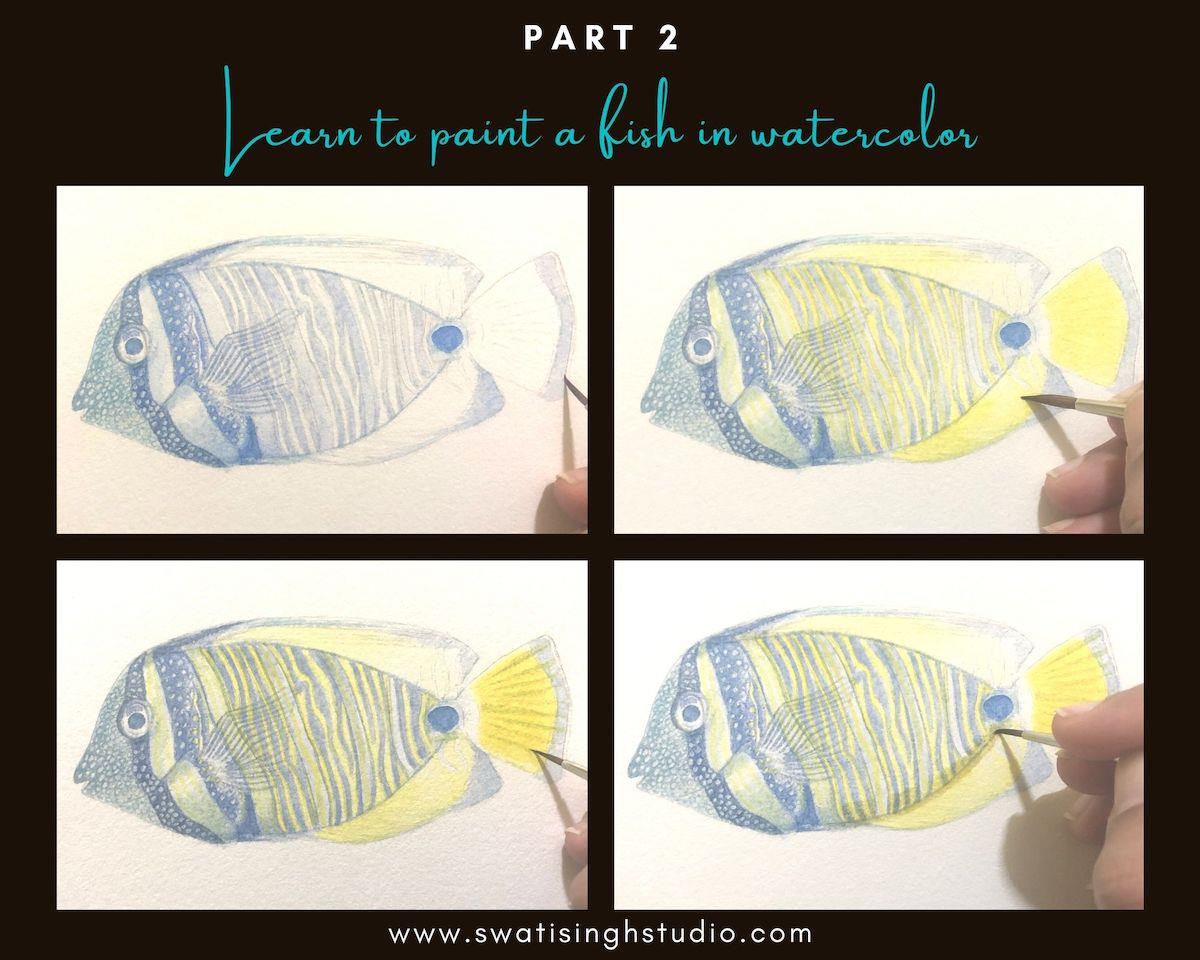
Step 5 - Make the zebra-like patterns in the adjacent band with ultramarine blue. Carefully leave out any yellow bands seen in the reference image.
In case, you accidentally go over them, not to worry just move ahead. No two fish will have the same pattern! Add ultramarine blue to the ends of the two fins and the tail.
Important- Just remember to keep it pale at this stage as we do not want a very bright blue color anywhere .
Step 6 - Moving on to the yellow sections now. If you carefully observe the shade of yellow in the reference image you will see that it is more towards a greenish-yellow side rather than an orangish-yellow side.
Hence, I chose lemon yellow for this since it is naturally a greenish yellow color.
Apply lemon yellow to the tail, fins, and the vertical stripes. You may use a # 2 brush for the side fins and the tail but the stripes need to be painted with a #0 brush.
Important: Make sure the blue bands are completely dry before you proceed with yellow color or else they will mix and result in a green color that we do not want.
Step 7 - Mix in just a slight amount of burnt umber with lemon yellow and use this shade to create stripes in the tail section. It is very important to use a fine brush here. Also, make sure that the yellow color underneath has dried completely.
Step 8- It is time to add some shadows to give our fish a form. Add a layer of clear water at the bottom section. Proceed with pale cobalt blue on top. Water will help the color spread evenly.
Important: Do not apply a lot of water or else you will risk cobalt blue spreading above. Keep it to a minimum so that it just assists the color in giving an even look. If you feel your brush is loaded with water simply dab it onto a tissue paper before applying it to the sheet.
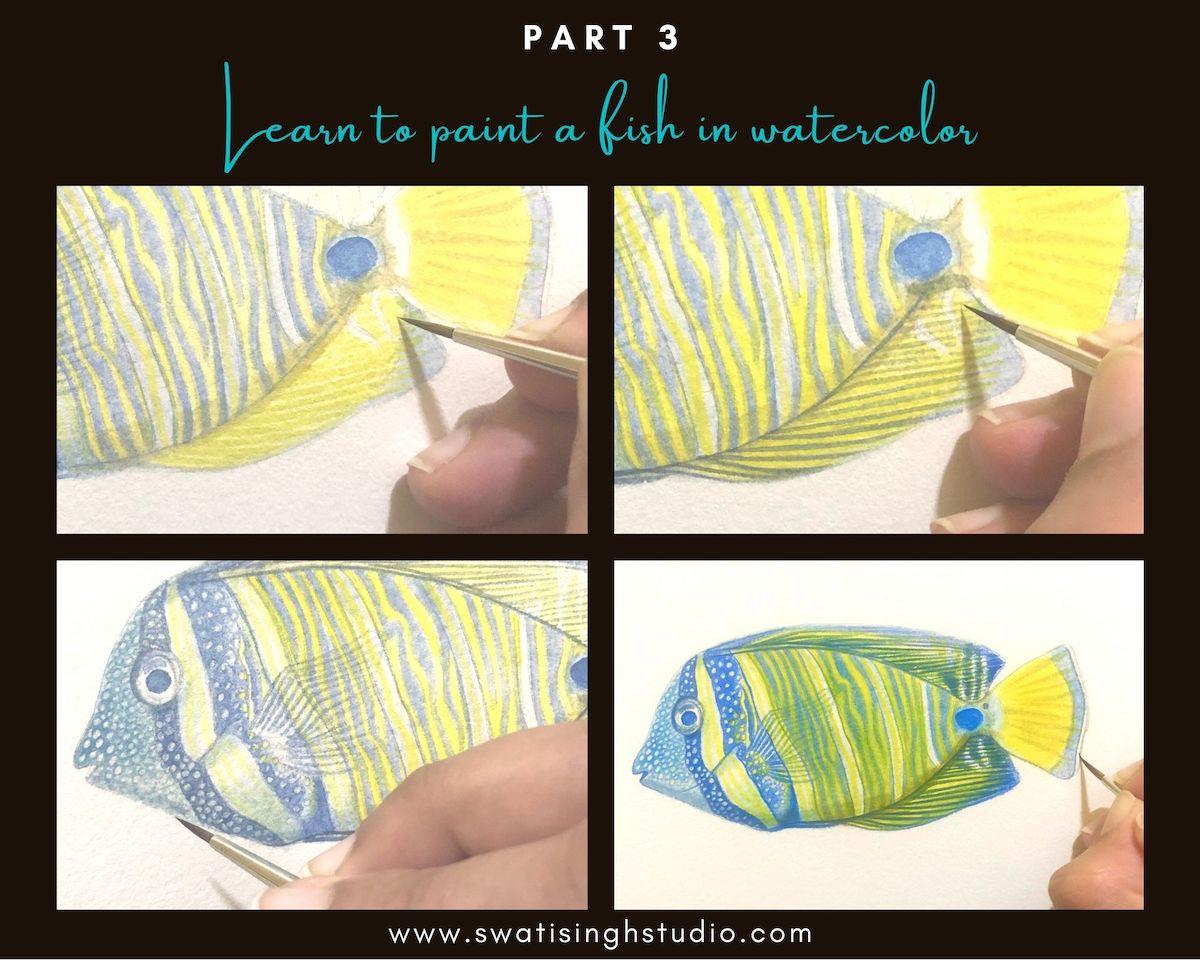
Step 9- It is time to add in the details to the side fins now. Apply lemon yellow to the stripes.
Step 10- Once the yellow color dries completely apply ultramarine blue to darker stripes with your thin brush.
Step 11- Apply some ultramarine blue to the shadow areas near the mouth.
Step 12- Go ahead and add a few more layers of color wherever required to get the right saturation of color. Also, clean up the edges by outlining the tail with a fine brush. You may use burnt umber mixed with lemon yellow for the same.
And here we are! The fish is ready. I hope you enjoyed painting this beautiful tang along with me.
You may follow me on Instagram and Facebook where I post some behind the scenes of the subjects I make a tutorial on.
I will be back with another tutorial soon.
Till then, Happy painting!
Swati