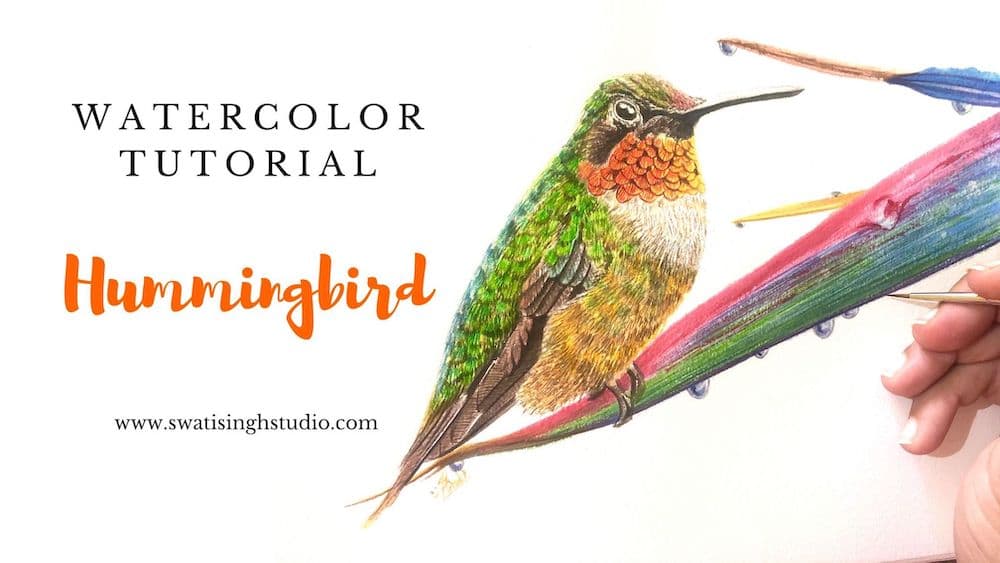
Red and Green are complimentary colors and they do make a very strong color contrast. No wonder nature loves applying these color theories in use!
The little feathers almost shine like glittering gemstones. As a gemologist my sub conscious mind starts relating things to various gemstones. This bird in particular reminds me of a gem called Ammonite. Or even a black opal!
Well, enough of the praising and let’s begin the painting process.
Below you can see the reference image used. I got it from Pixabay and belongs to theSOARnet.
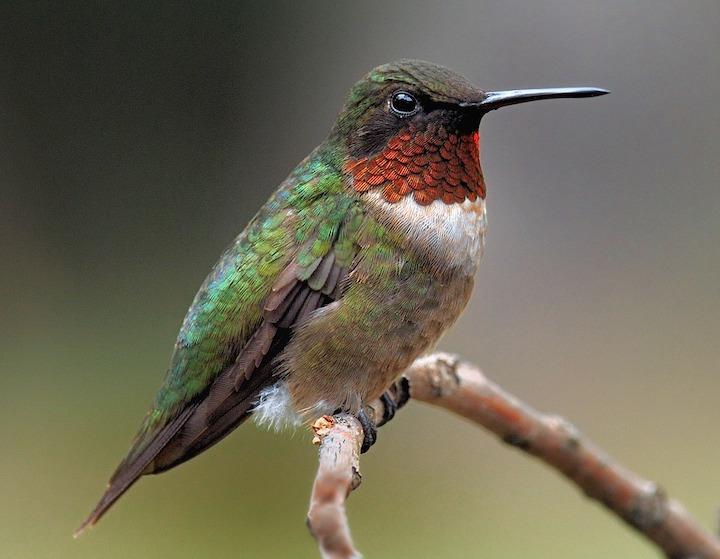
As you can see the colors are a bit dull on this one and I wanted to make the bird look bright hence, I have made a few changes in the color mixing to show the best of the best color a hummingbird can show.
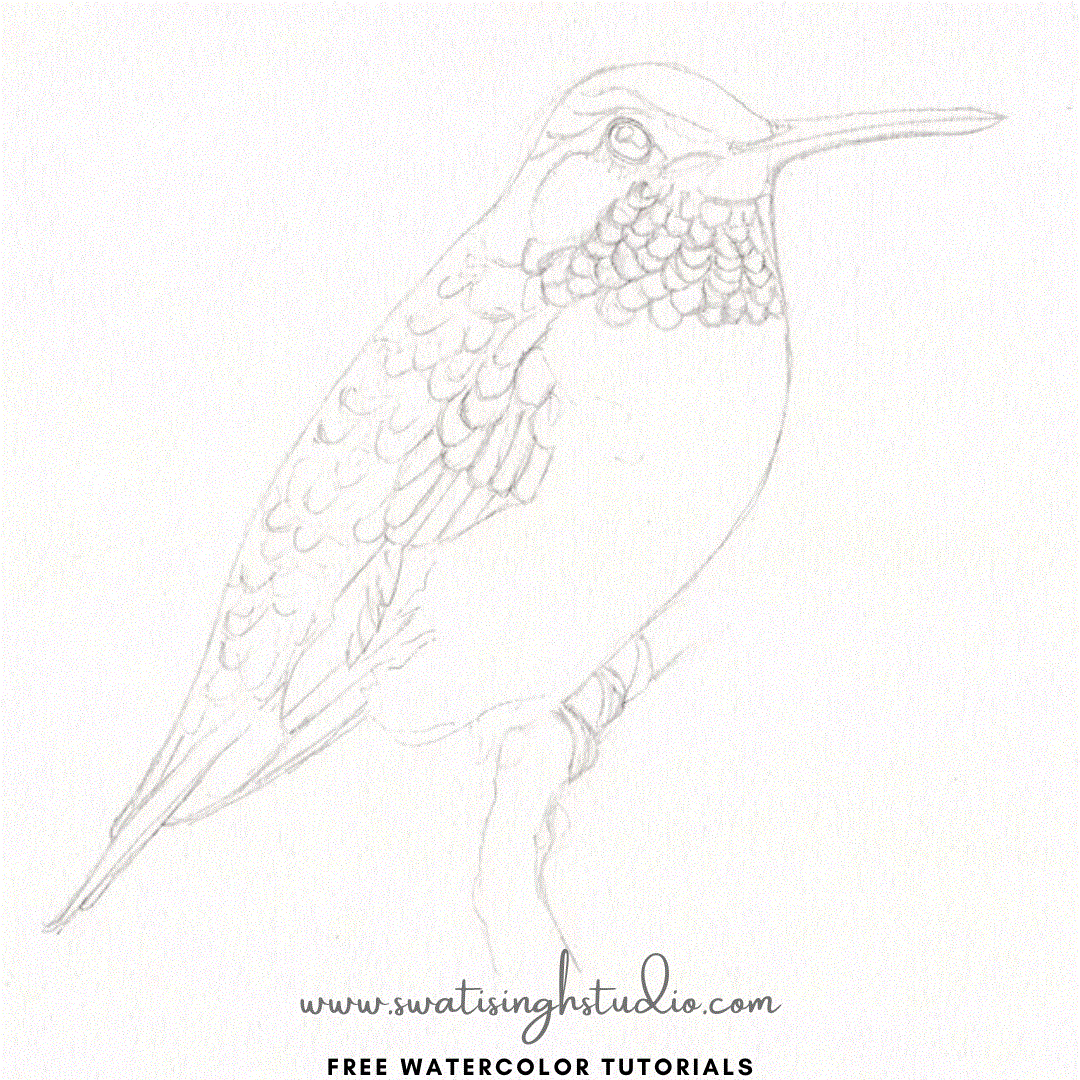
Here is the pencil drawing you can use for your practise.
Watercolors used are:
1. Lemon yellow
2. Gamboge hue
3. Orange
4. Scarlet Red
5. Burnt umber
6. Black
7. Sap green
8. Viridian hue
9. Burnt Sienna
10. Yellow Ochre
Brushes required: Round #0, 1, 2
THE METHOD
There were tons of pictures for the hummingbird. With so many colours on the body it surely requires a lot of layering. I simplified the steps by making a collage or else it would have been and endless post!
So just follow the collage by moving left to right row by row.
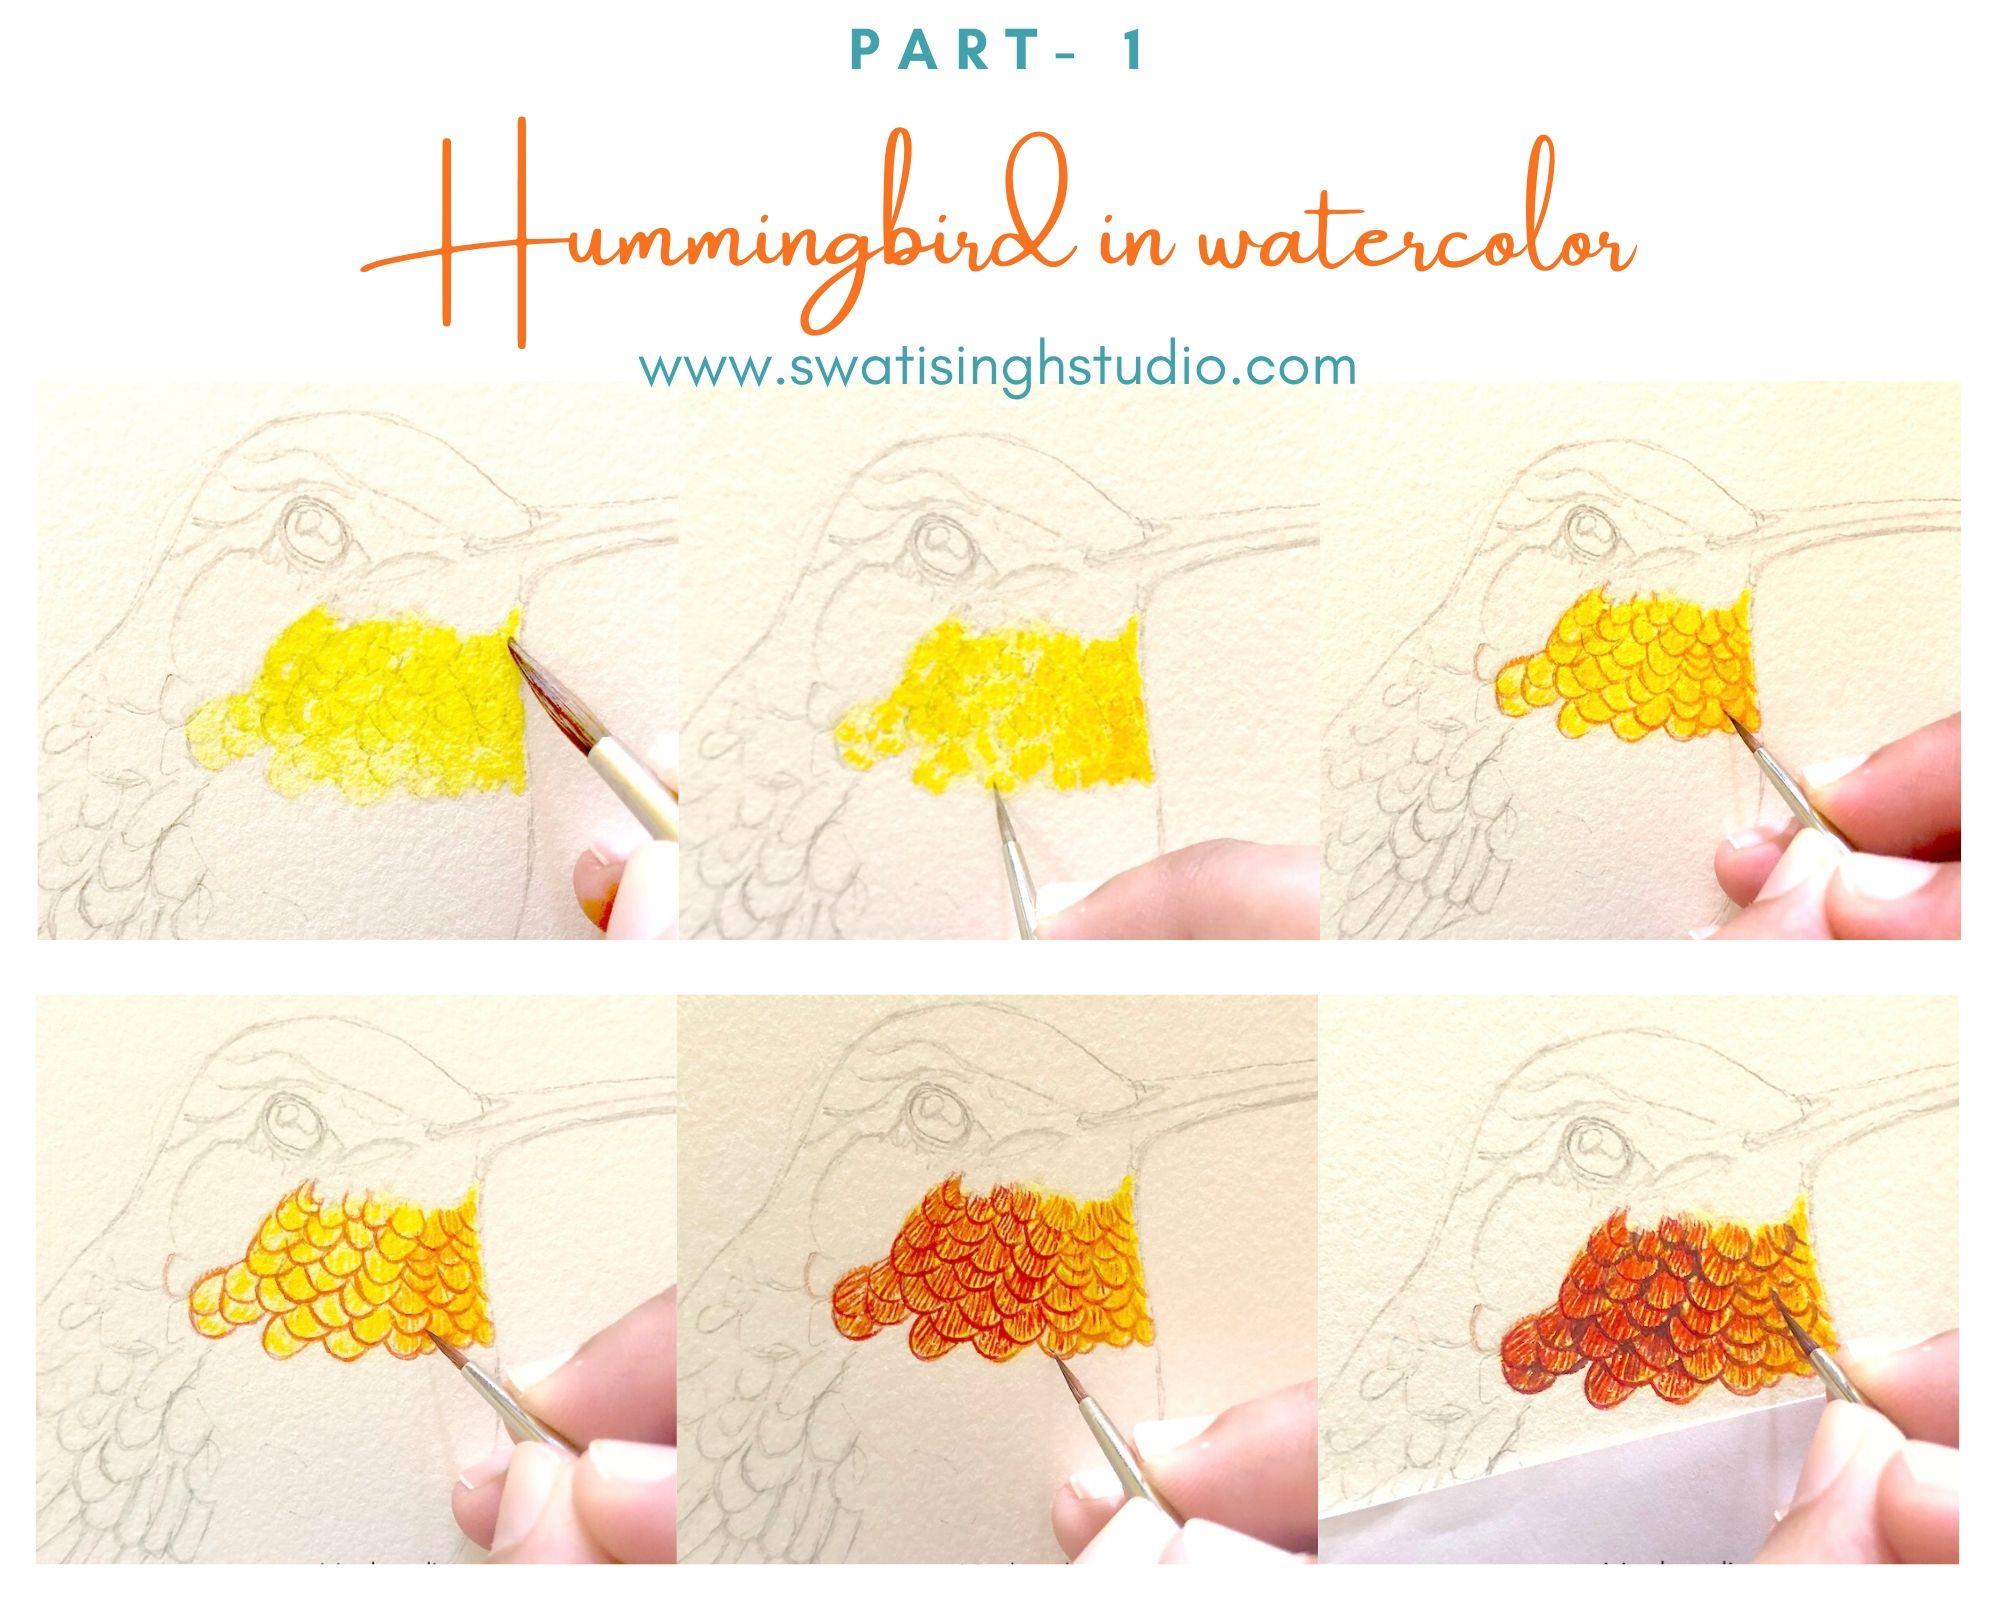
Step 1- Let’s tackle the most beautiful part first. Apply a layer of lemon yellow on the red throat area. Lemon yellow will help it get that glow we see when it shines!
Step 2- Once the lemon yellow dries. Take your finest round brush. I am working with a #0 brush. Make vertical marks on the feathers with Gamboge Hue. Keep the lines apart.
Step 3- Now with same brush, outline the feathers in orange. Keep it saturated. Use less water.
Step 4- Dilute orange a little and make vertical lines inside individual feathers.
Step 5- Now mix orange with some scarlet red to get a darker shade of orange. Repeat the previous step by layering with some more vertical lines. Also, apply it to outline individual feathers.
Step 6- Now add shadows by adding a hint of burnt umber in the areas you see blackish darks. This will help uplift these feathers and make them look 3D.
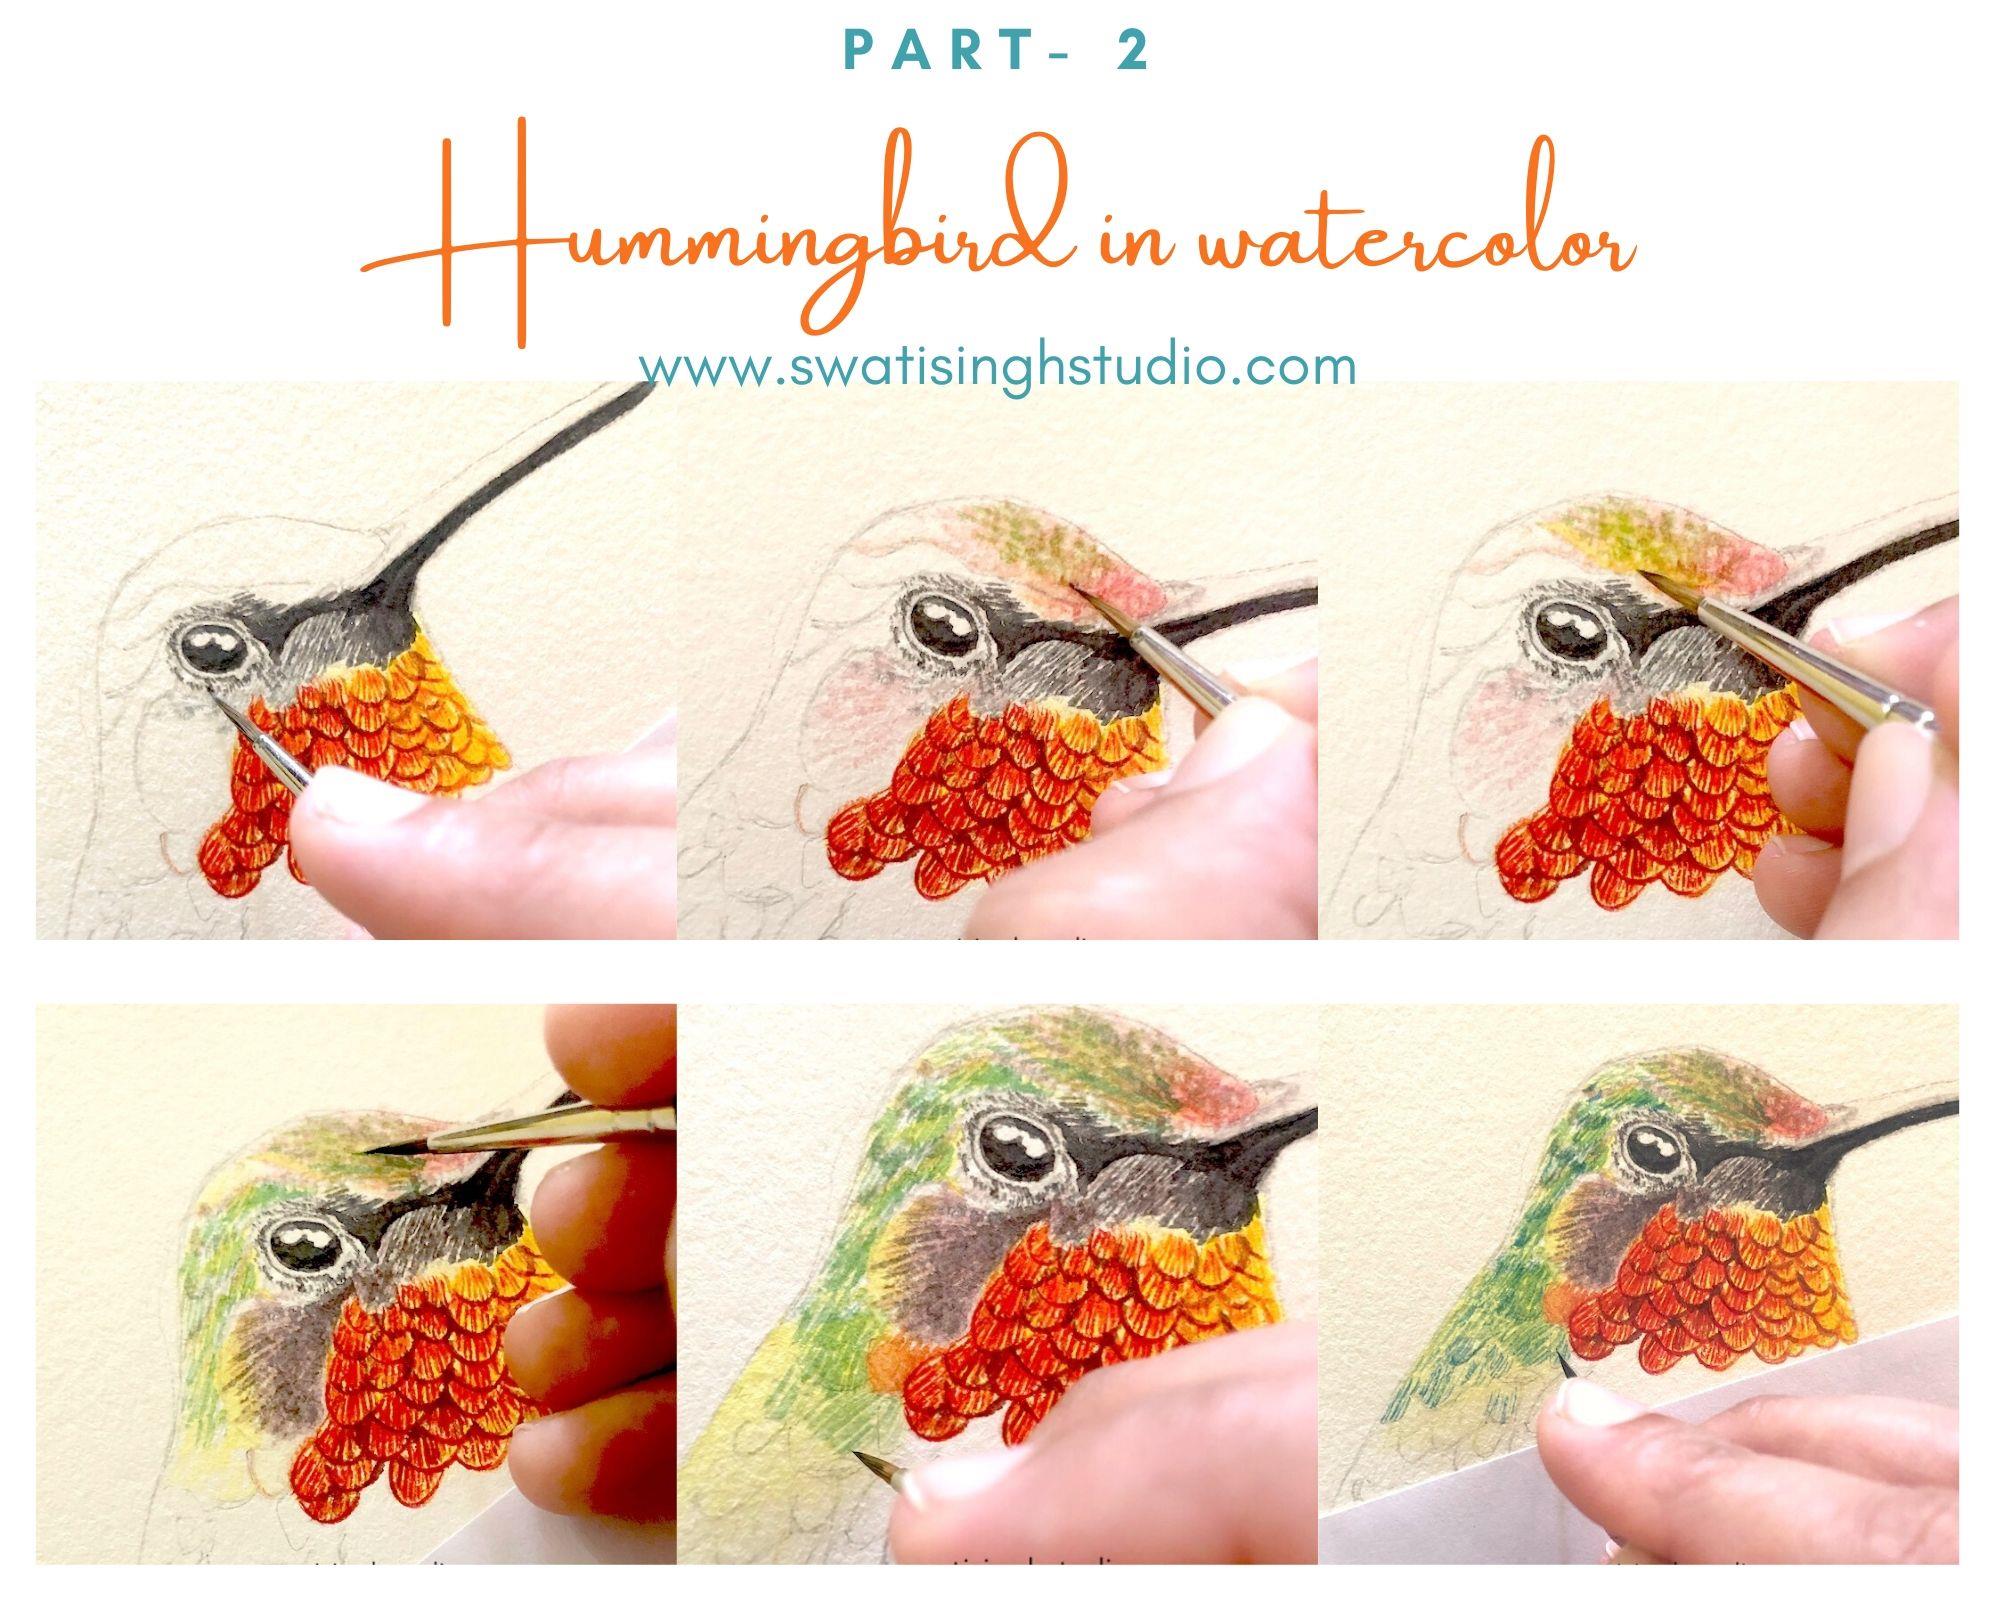
With the red part taken care of. Let’s add that sparkly eye :D
Something about the eye just makes any bird come to life.
Step 7- Although I try not to use ready black in paintings. But I thought I will see how it looks. So I am using black to add to the eyes and the beak. Make sure to leave out the highlights in the eye and area around it. You see small feathers around the beak and the eye. Simply, use a #0 brush to make small lines to suggest that fir like body.
Step 8- For the head we need to mix a few colours together.
Start by applying a glaze of clear water in the area. Now apply a dilute layer of Burnt Sienna. Remember to make small lines to suggest that texture.
Next, add some strokes of dilute sap green. Keep the area wet when you do this to get that softness.
Step 9- Next, add a little yellow ochre for those mustard area.
Step 10- Now apply lemon yellow on the left side of the bird. Add small strokes of Viridian Hue. I understand this might take you some time. But have some patience it will help. Remember to enjoy the process!
Step 11- Mix in some strokes of sap green in between. This will give some interesting shades.
Step 12. Adding some more Viridian to give it more depth. It’s all about layering!
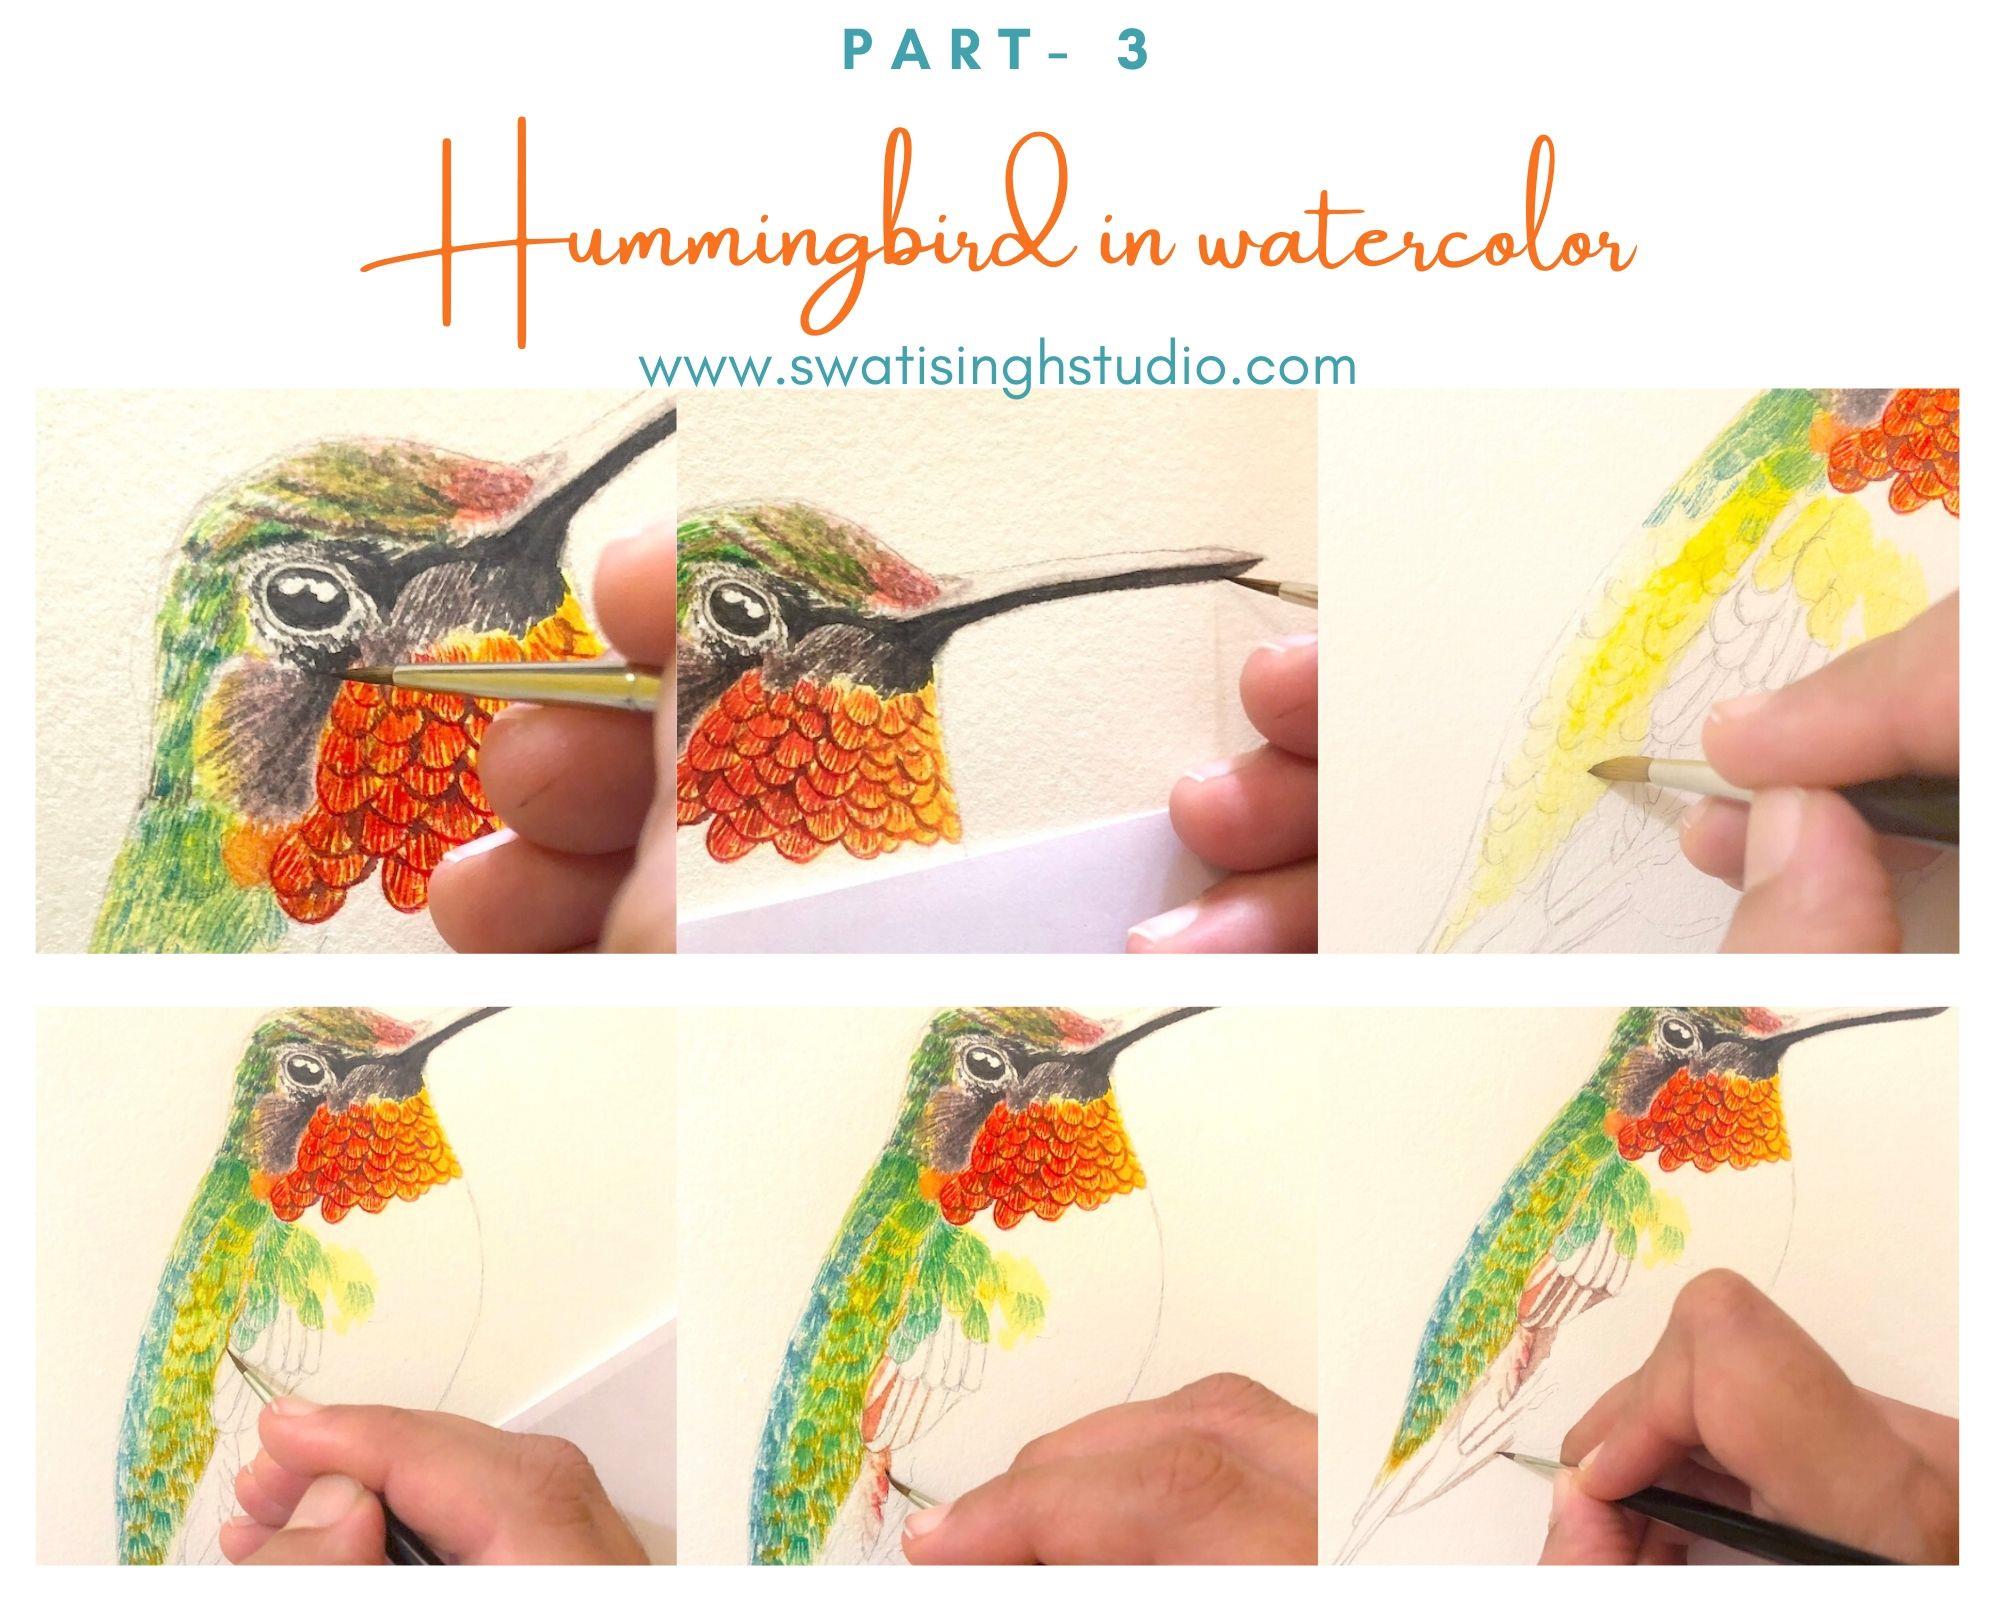
Step 13- I am darkening the black here. Apply another layer of black. Make sure to add some burnt umber around the black area to show some transition.
Step 14- Darken the beak with another layer of black.
Step 15- Simply repeat the process of adding some more feathers starting with a glaze of lemon yellow first. I tell you this will make the whole difference!
Step 16- Outline the individual feathers with burnt sienna. Make sure everything dries before you proceed or else it will turn muddy. I am making small vertical lines to outline here.
Step 17- Moving onto the right side feathers which lack those iridescent colors. But it does have some interesting brown and blacks. Start by adding burnt sienna on the left.
Step 18- Now outline individual feathers with burnt umber and apply the same in shadow areas.
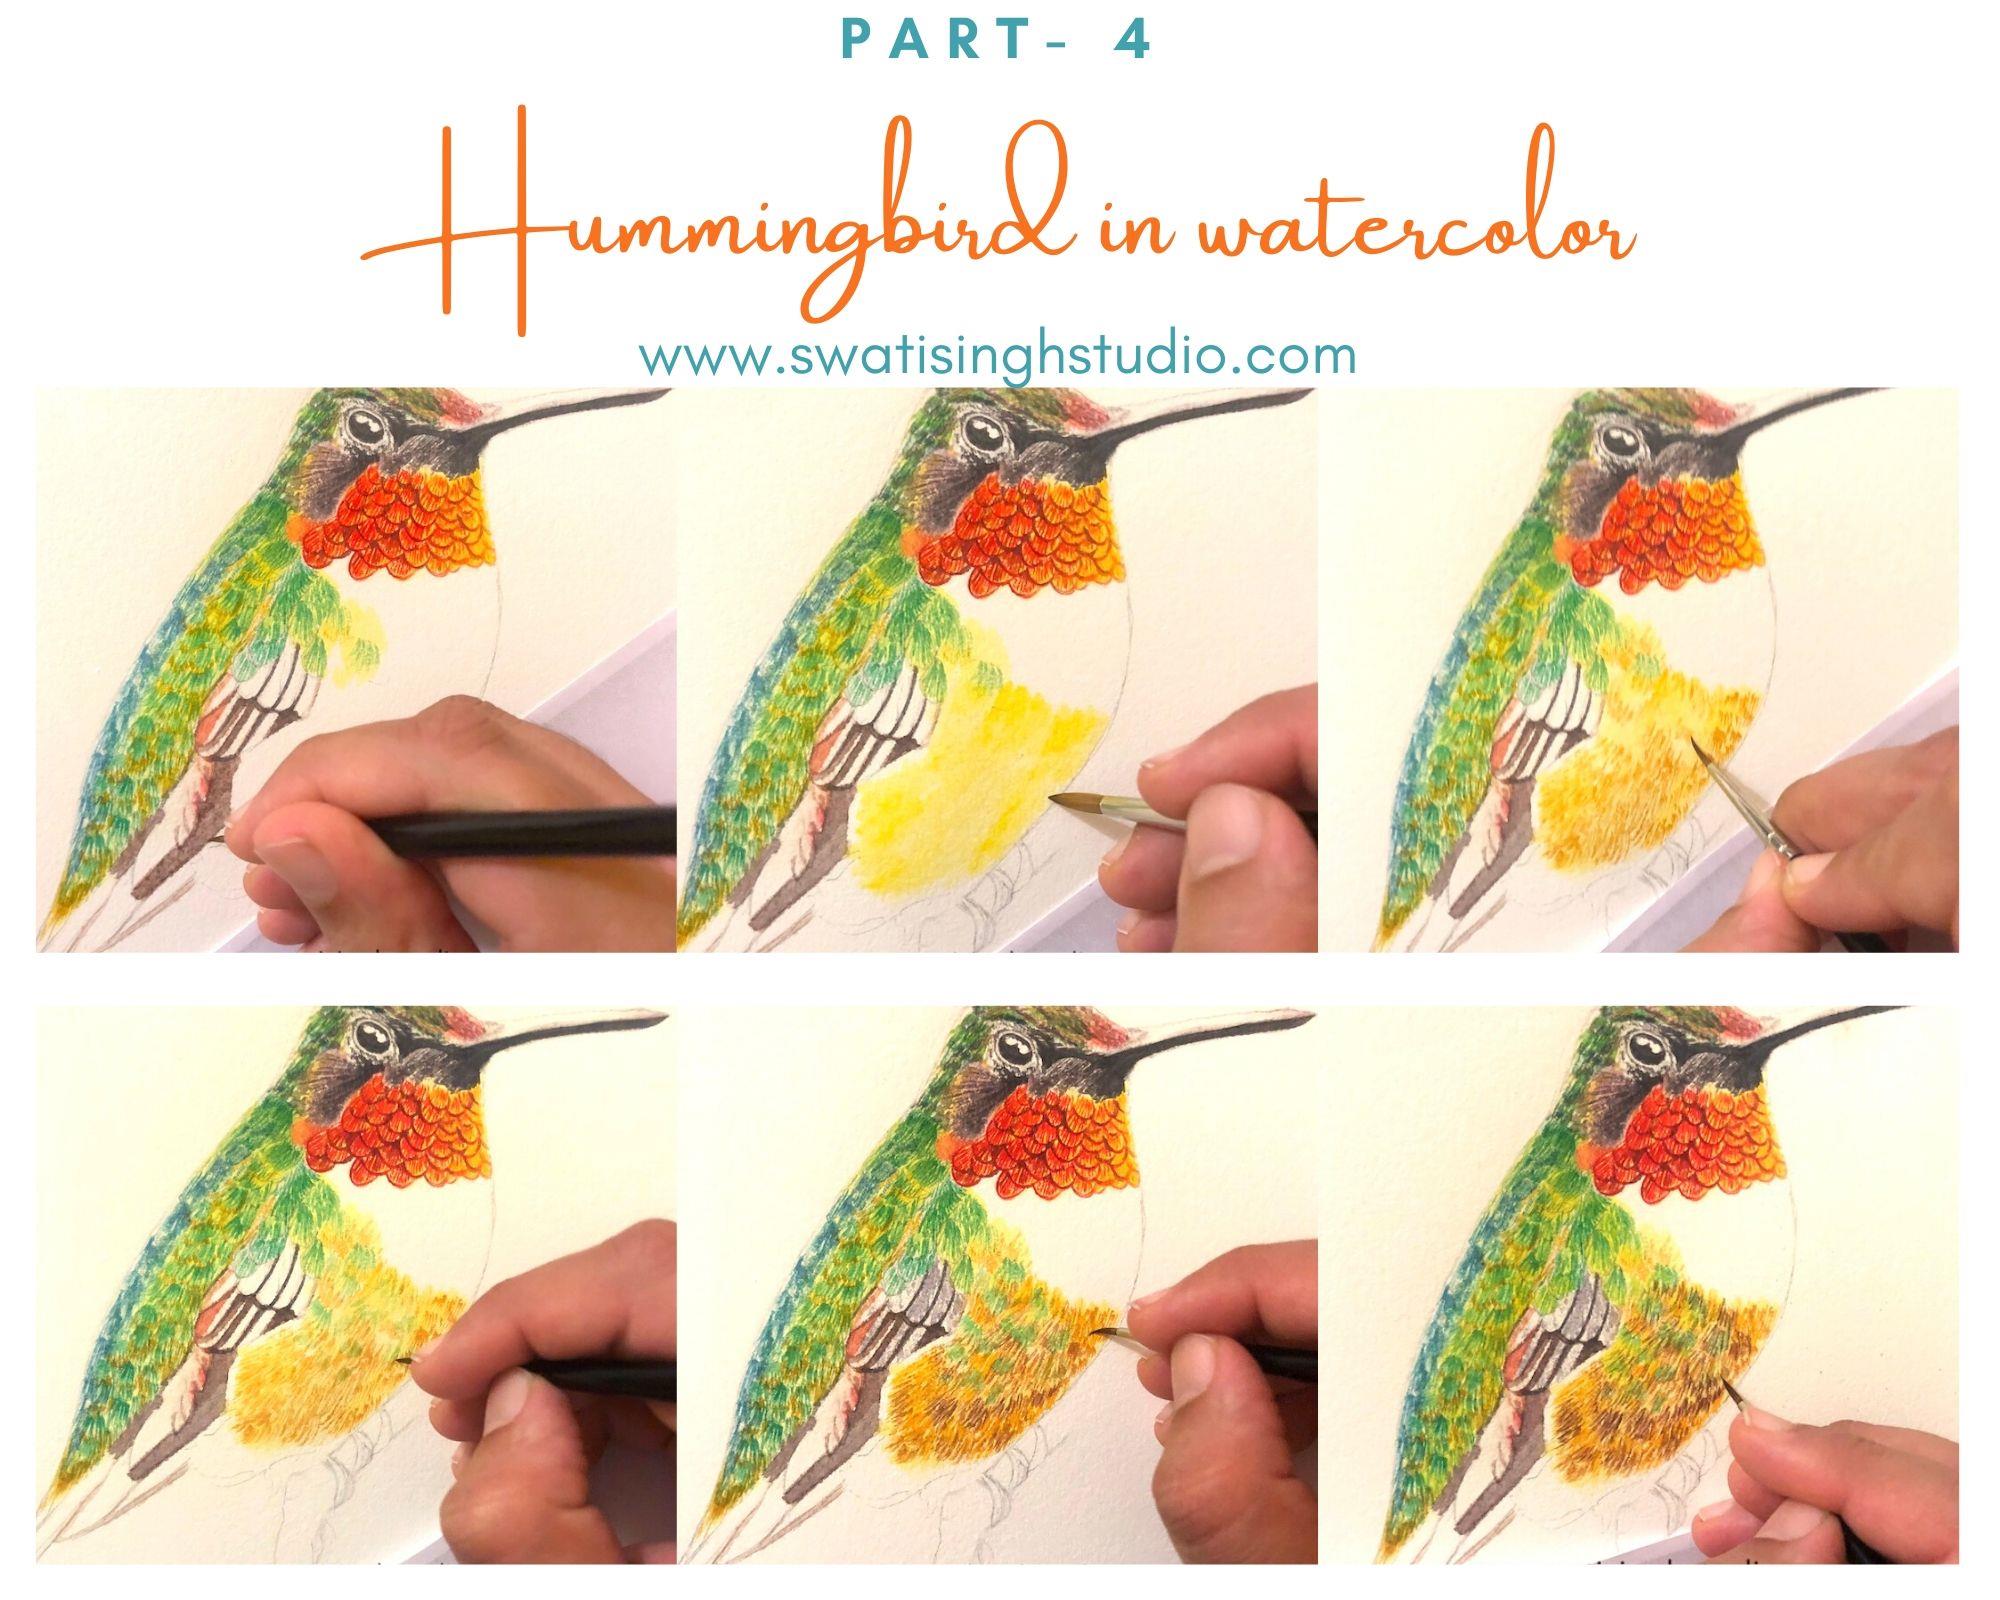
Step 19- Darkening with some more burnt umber.
Step 20- Moving onto the right side belly. It has some interesting mustards. Start with a glaze of lemon yellow.
Step 21- Once lemon yellow dries add Yellow ochre in small strokes. Use a fine brush here.
Step 22- Add some strokes of viridian hue mixed with sap green. I will suggest you to dilute it first since, Viridian hue is a staining color and a very strong pigment. We don’t want it to be extra bright.
Step 23- Add in some burnt umber for those dark areas.
Step 24- Layering some more with those colors.
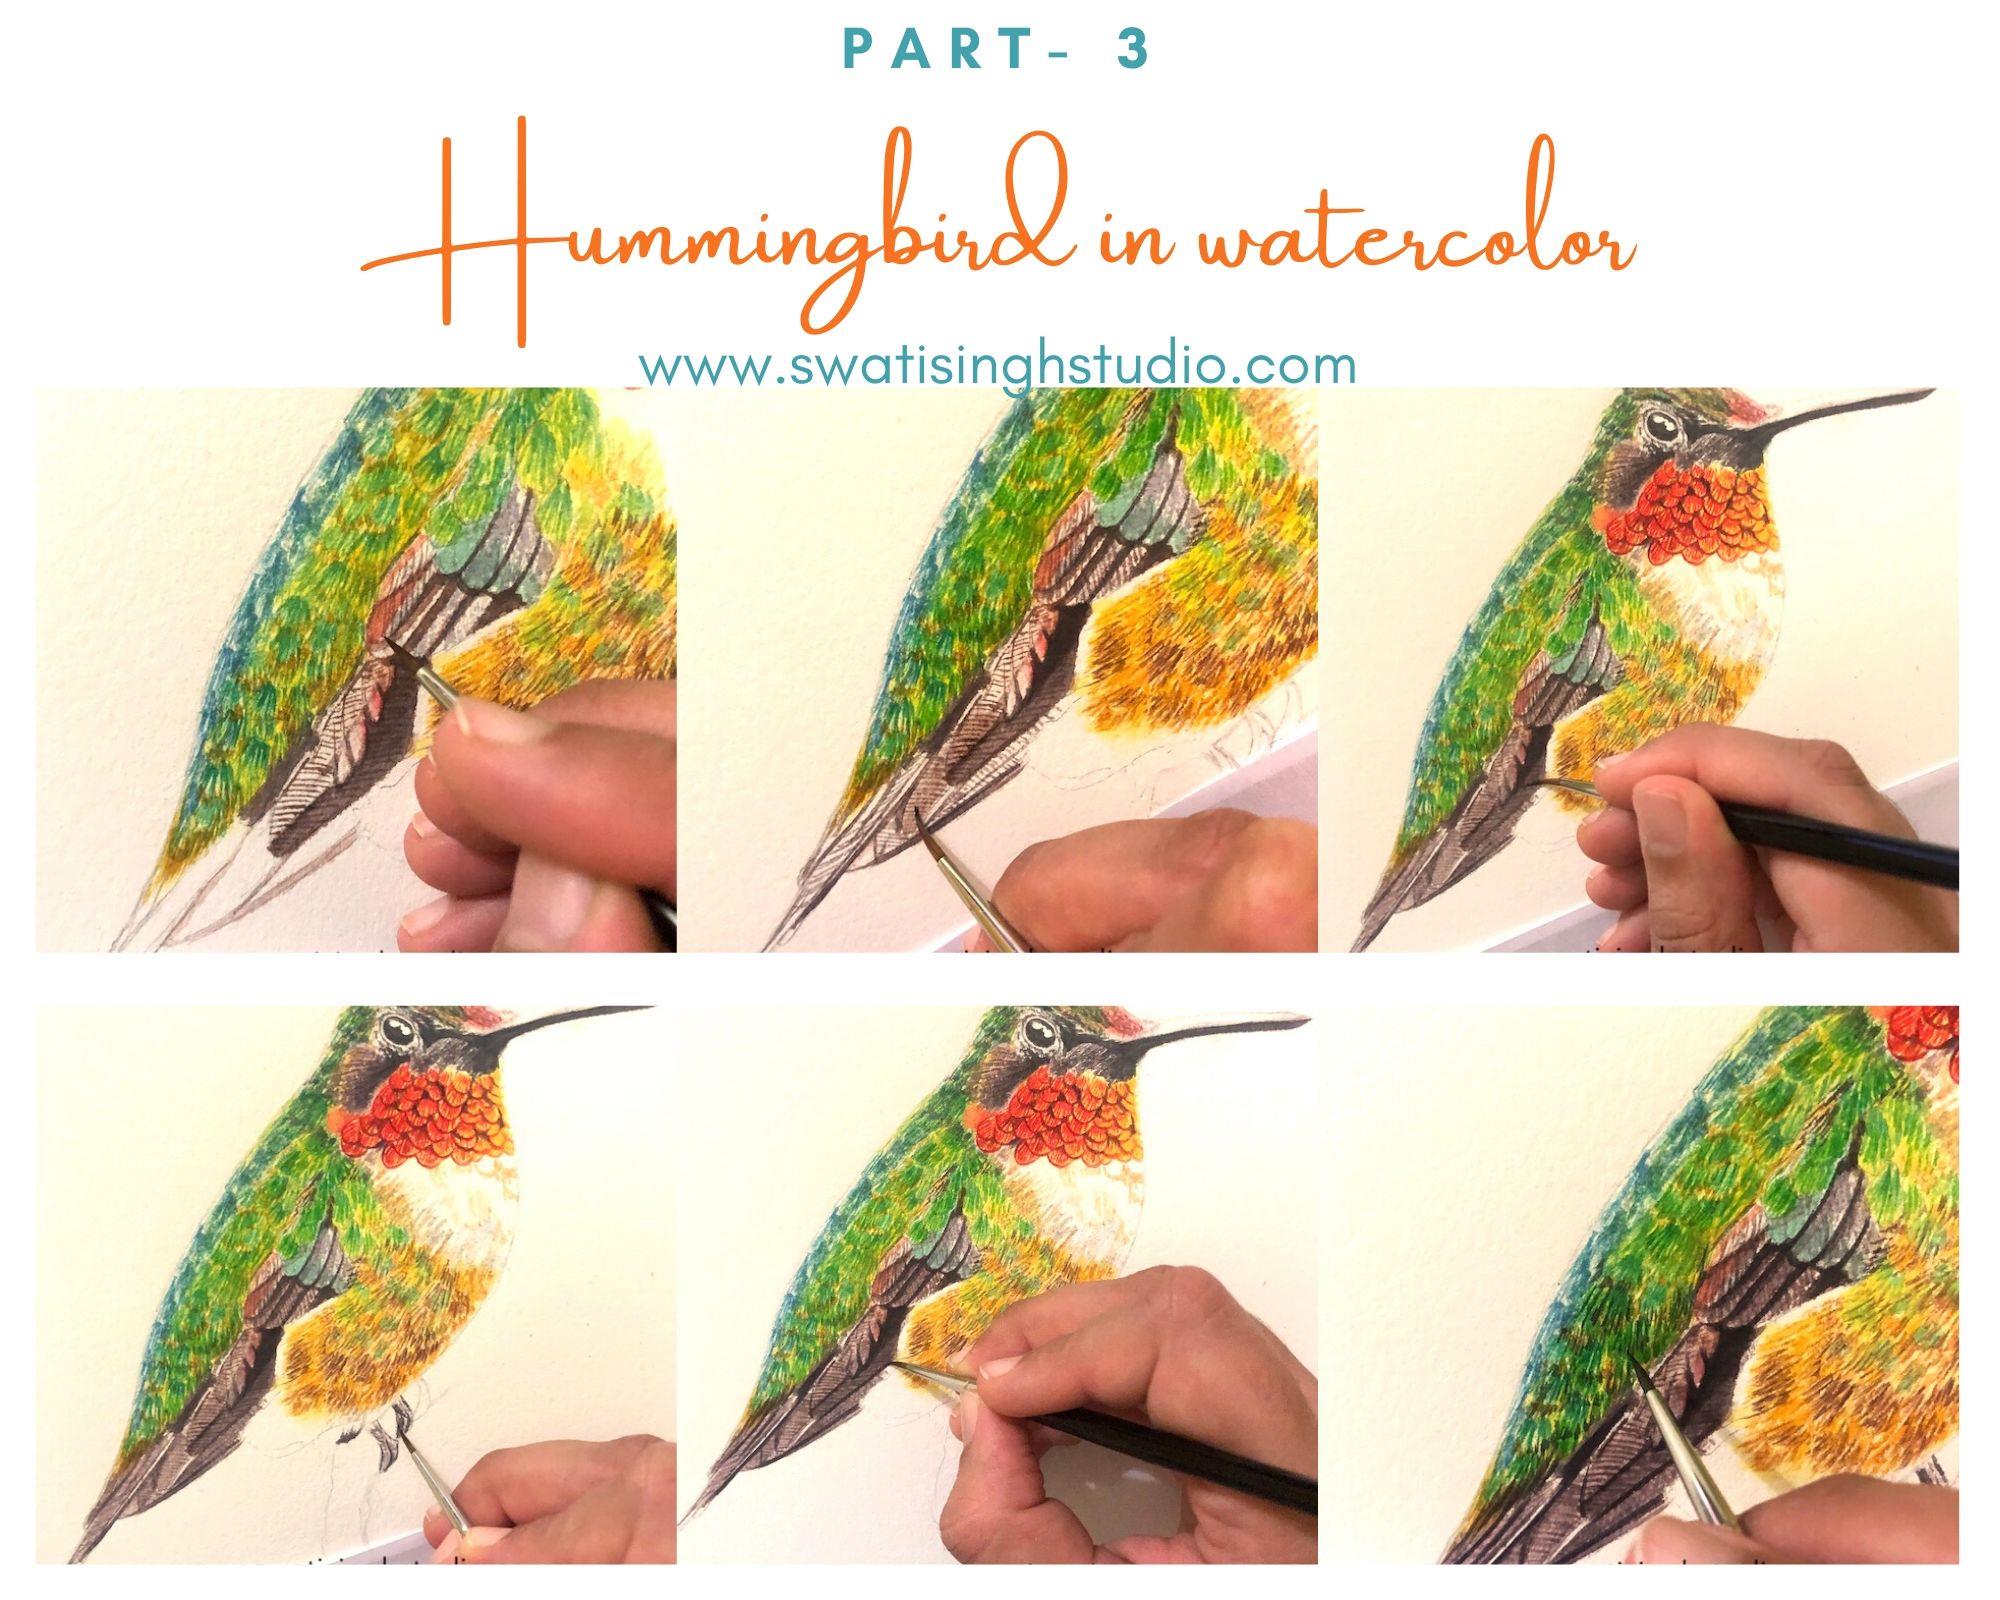
Step 25- When you observe these feathers you will see some texture to them. Simply apply diagonal strokes of burnt umber.
Step 26- Once the color dries apply a glaze of burnt umber over the texture painted. Keep it diluted enough so that the texture shows through.
Step 27- Doing the same on the right side but keeping it comparatively dark.
Step 28- Add some black on the tiny feet. Outline the feet in black.
Step 29- Outline the feathers with black to achieve depth.
Step 30- I am darkening the feathers a little more with some burnt umber in between.
Almost there. Just a little more layering. I added bird of paradise flower instead of a branch. I thought that made it look more interesting.
What do you think? Let me know in the comment section below.
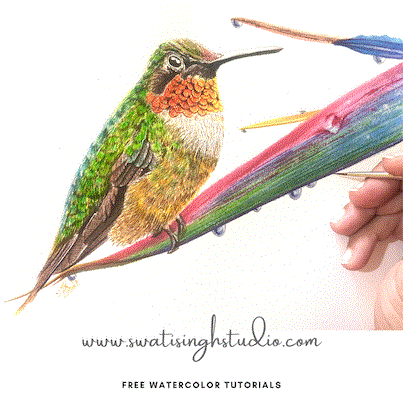
Prints are available for purchase in Shop now.
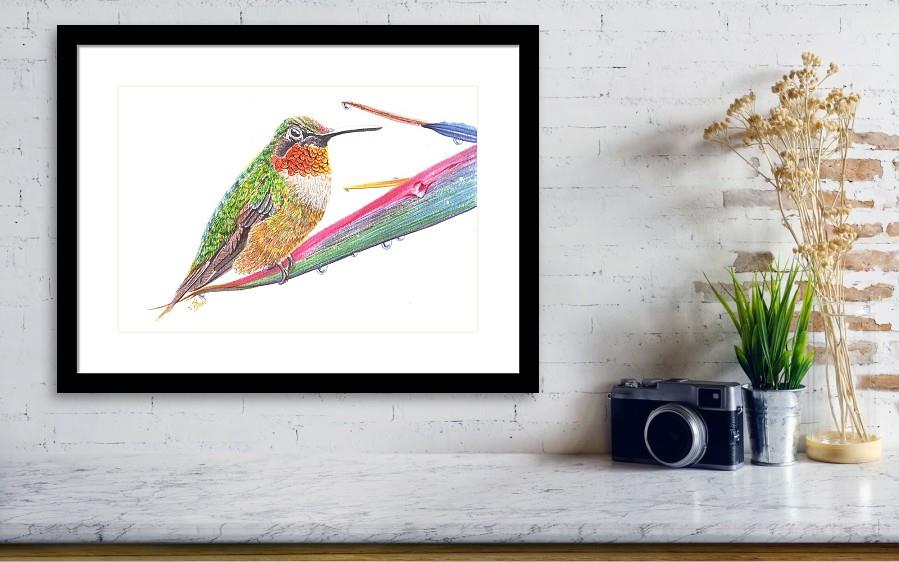
I would love for you to try this one. I am sure you will have fun painting this colourful bird. Let me know how it turned out in the comment section below.
Will see you all with another tutorial soon.
Till then happy painting!